• As Life Would Have It

Jean's Blog of Life, Farms and Everything

~ Welcome to life on our mini-farm in the AriDzona desert!

Jean's Blog of Life, Farms and Everything

Tag Archives: wood furniture

January Cure More on the Laundry Room Project

14 Wednesday Jan 2015

Posted by Jean in January Cure

≈ 2 Comments

Tags

DIY, do it yourself, home decor, homemade furniture, January Cure, wood craft, wood furniture

I have now spent more time in my laundry room in the past six days than I have in 10 years. So has John. We have, in fact very probably spent more time in that laundry room in six days than it took our 12 pack a day builder to build it. I have definitely spent more time in the closet in the past six days than in the past 10 years. It was dark and it was scary and if there had been any other place in the house to keep a 25lb bag of dachshund kibble I wouldn’t have opened those doors at all. I had to move all of my newly purged and organized stuff back out of the laundry room, which meant it landed once again on my newly cleaned and pristine kitchen. Each time I have to shuffle stuff out of there I end up purging more simply because I don’t want to have to move it back. “Do I really need bleach?” “Do I really need floor cleaner? Not like anything works on it anyway. I’m pitching it.” The dachshunds did step in and prevent me from tossing that 25 lb bag of kibble but I’m still wondering if I really need to drink water because gawd am I tired of lugging THAT stuff from one room to the other.

helpfuldogs
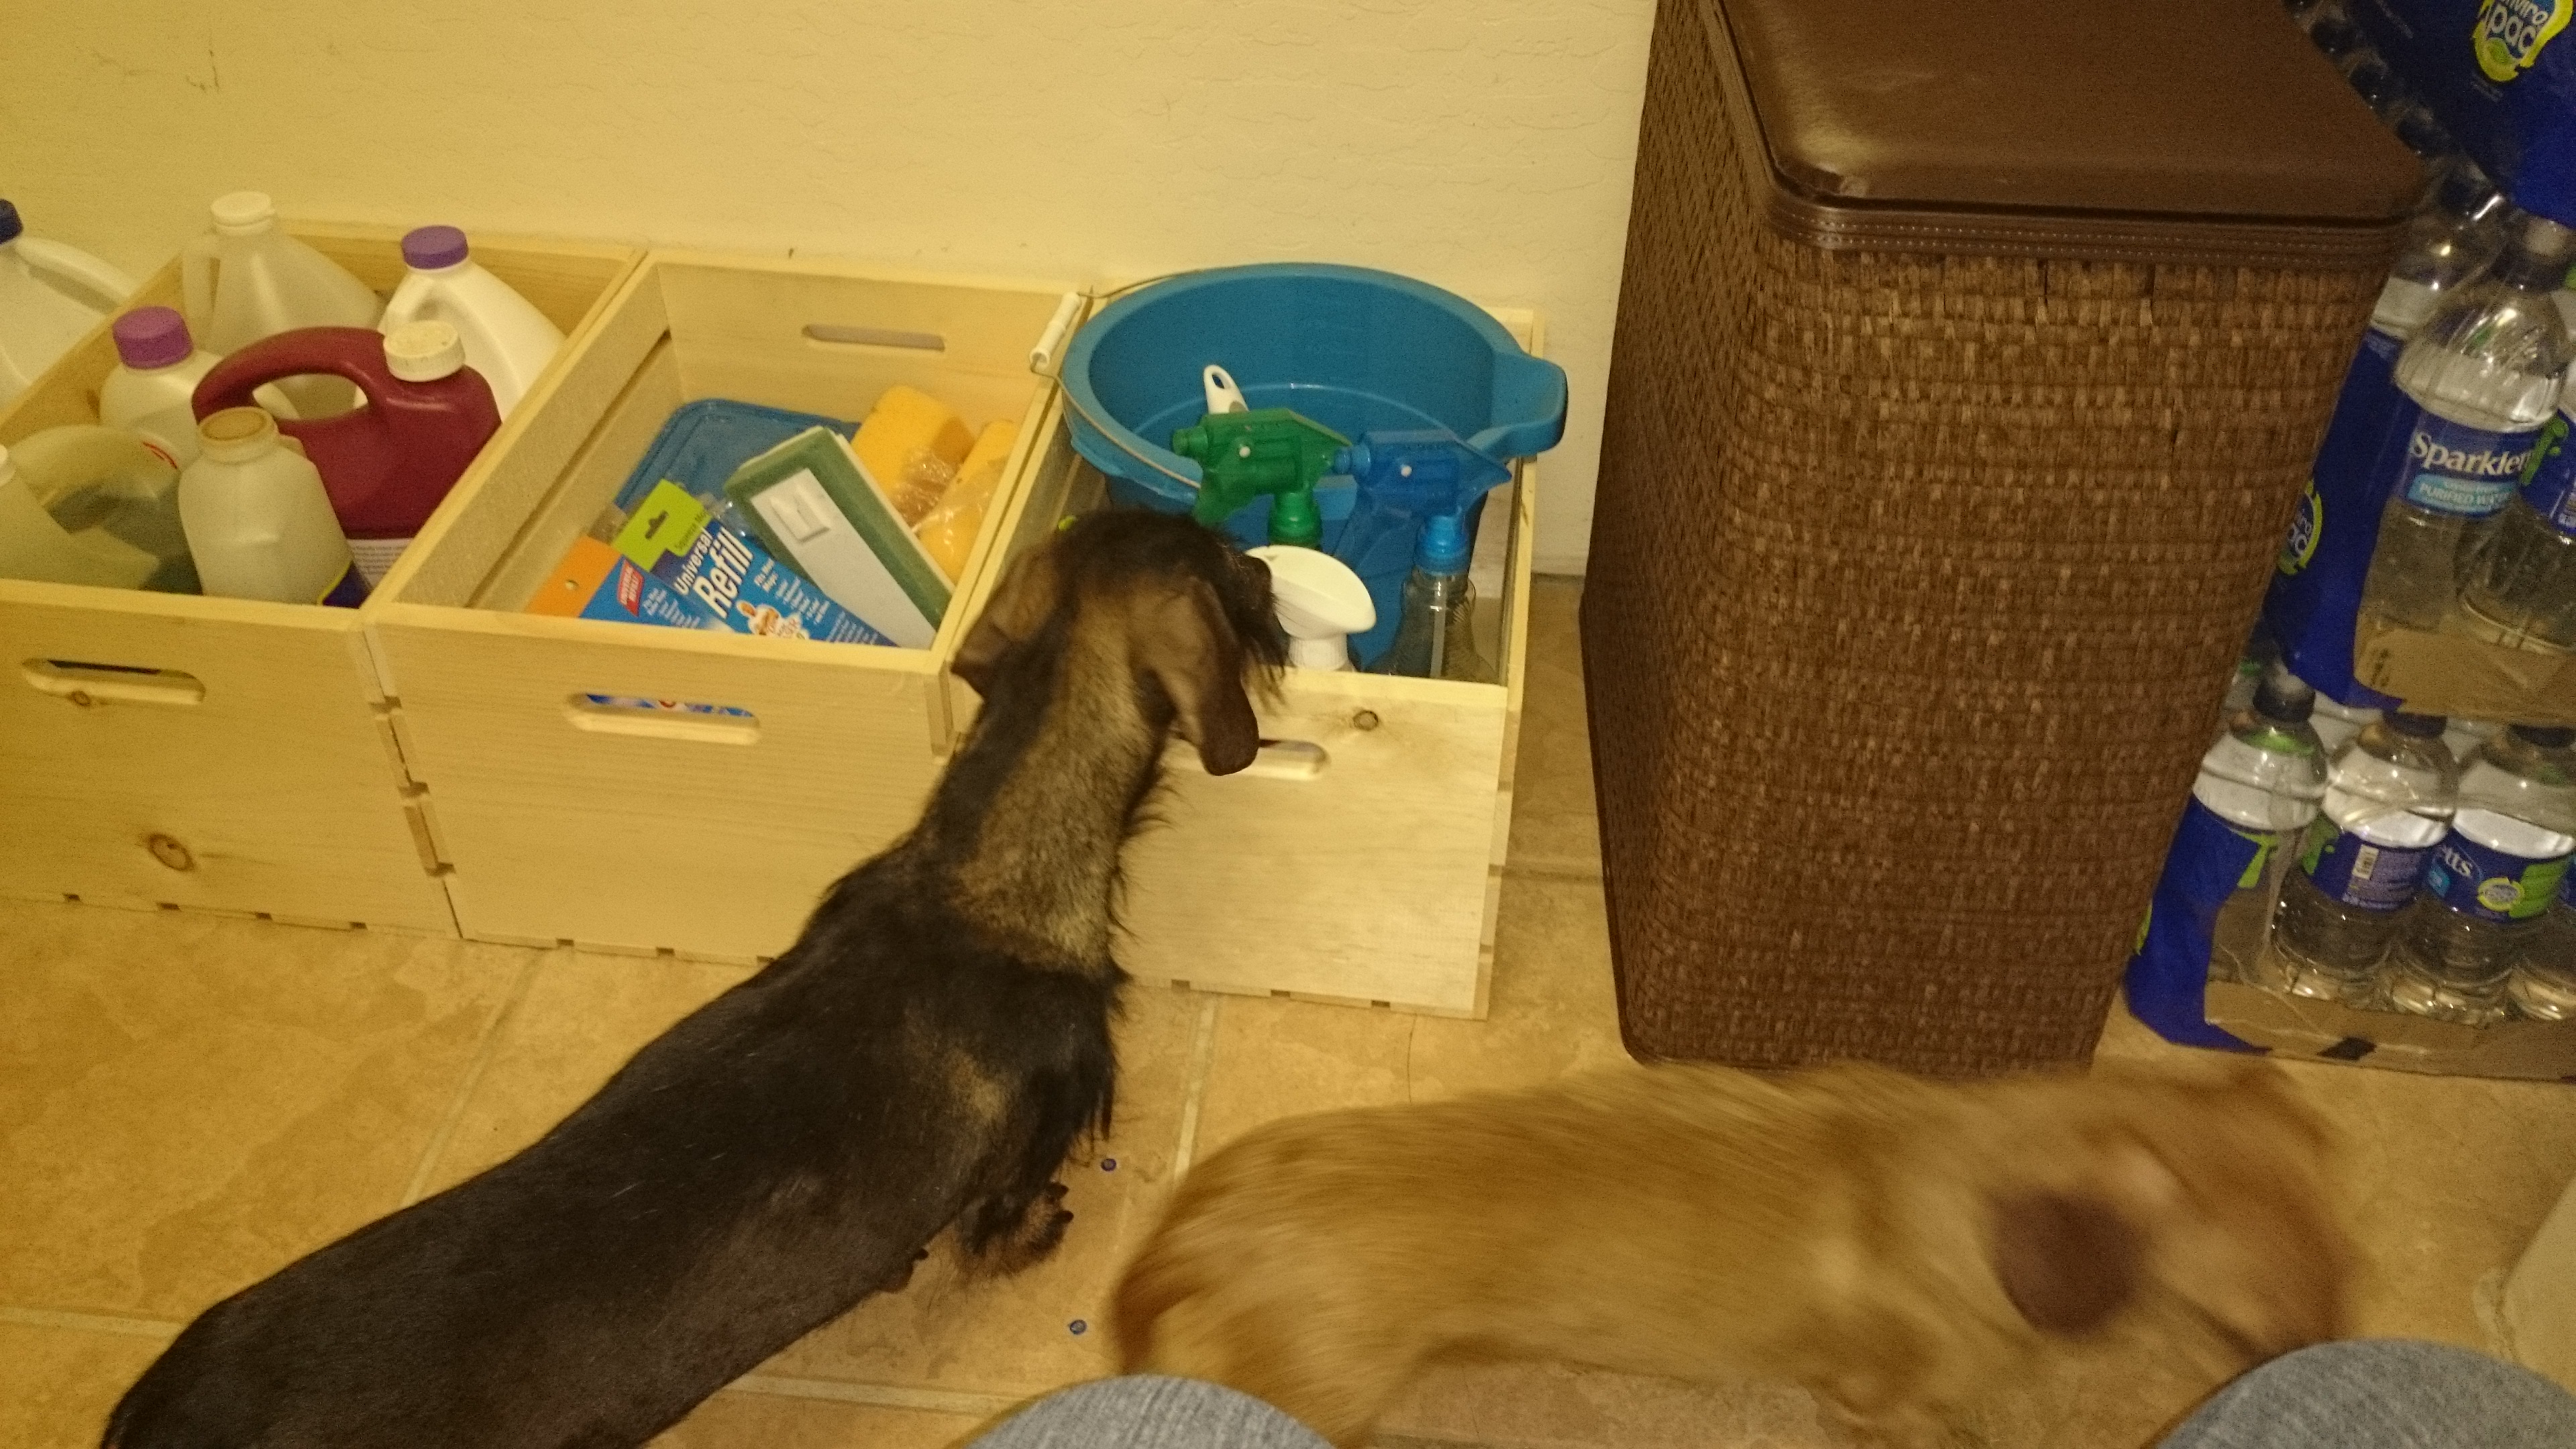
The dastardly dachshund duo came in to help shuffle all the stuff to the kitchen.

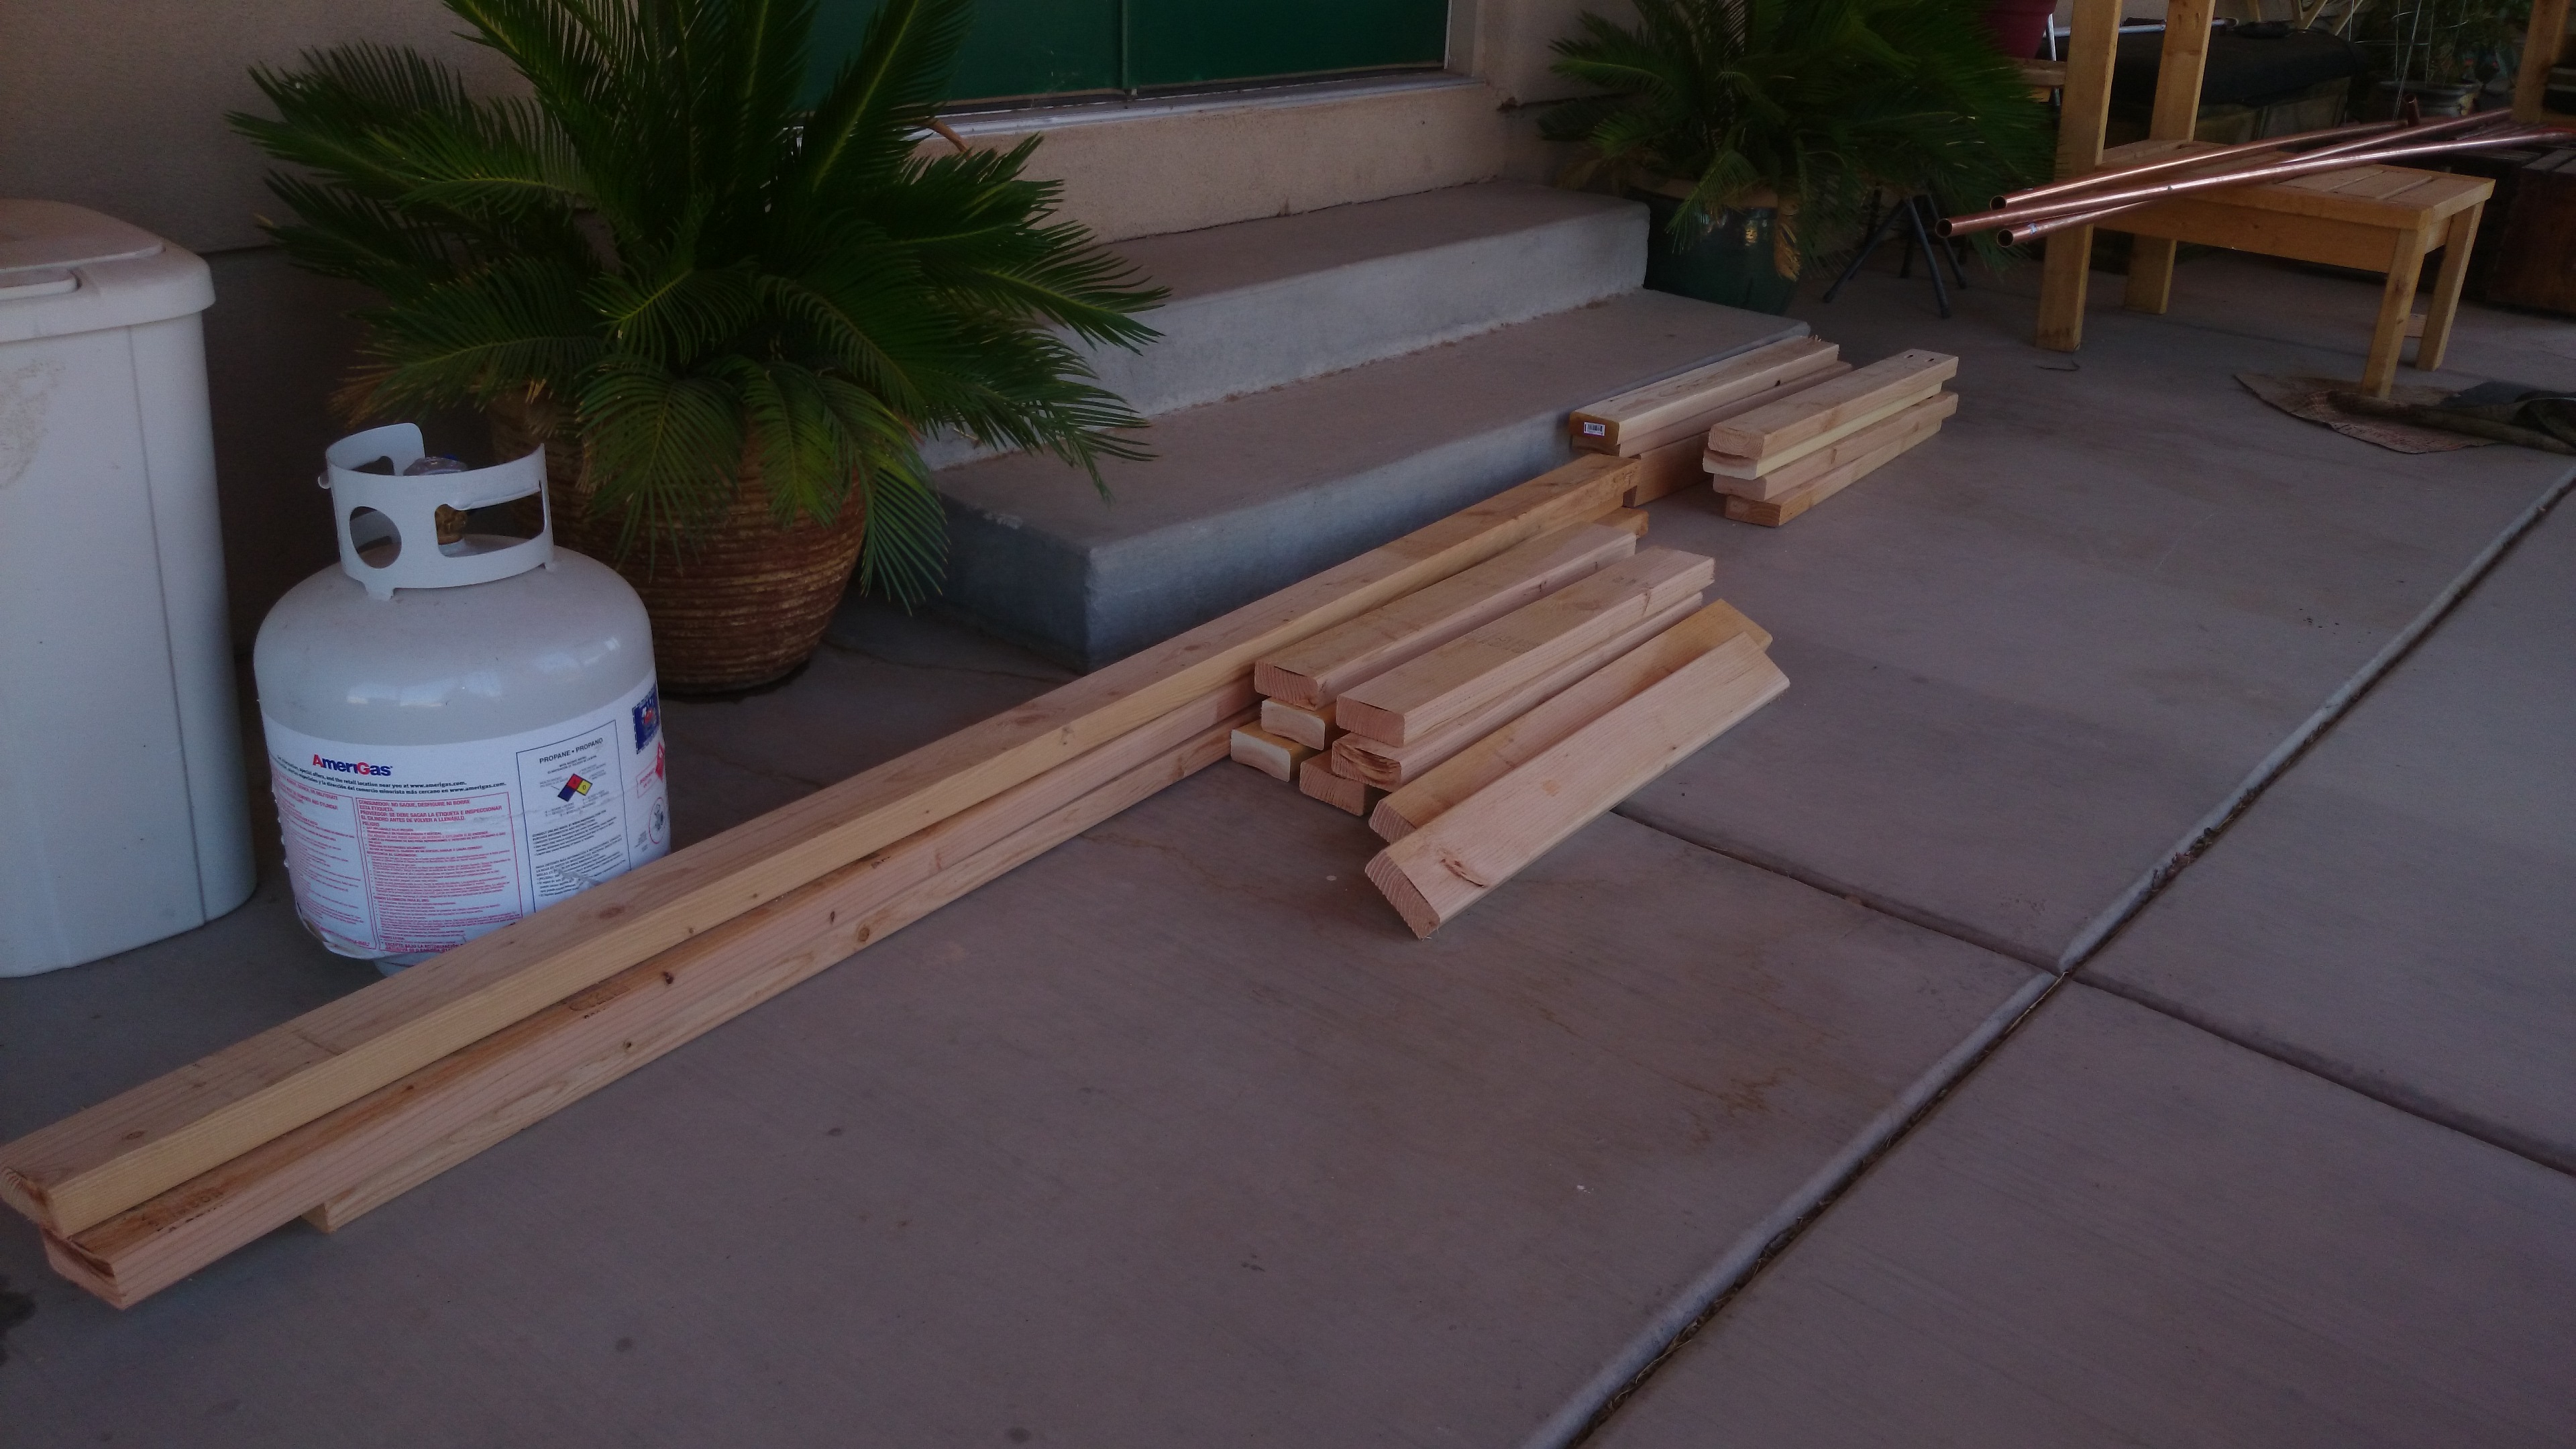
Once all the stuff was shuffled out of the way, I measured the floor space in the closet, height of the kibble bag container, height of two stacked cases of water, and the height of my tallest appliance in order to arrive at the size table we needed. One thing that irks me about 2 x 4s is that they’re not really 2 x 4. They’re 3.5 x 1.5. Only guys would think this is reasonable. Me, I’m thinking if I’m paying for that width and depth I should damned well get that width and depth. So, when I’m measuring how deep this table needs to be for maximum storage in the space available, I have to take this .5 for each board into account. This is not as much of a problem as it once was because I have actually learned to take that .5 into account. But it’d be a heck of a lot easier if I didn’t have to. The only possible explanation for the discrepancy is that most guys are just used to adding at least half an inch to their actual measurements, unless they’re talking waistline.

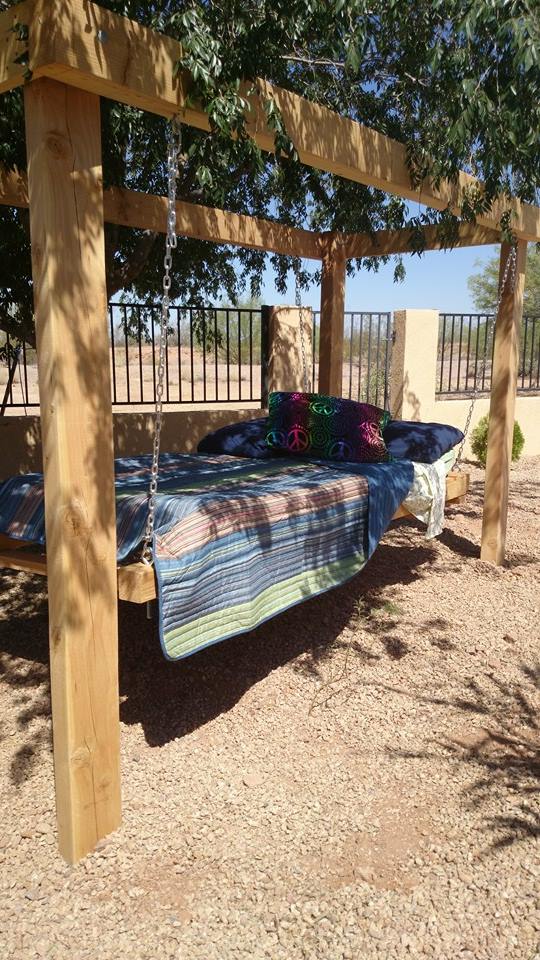
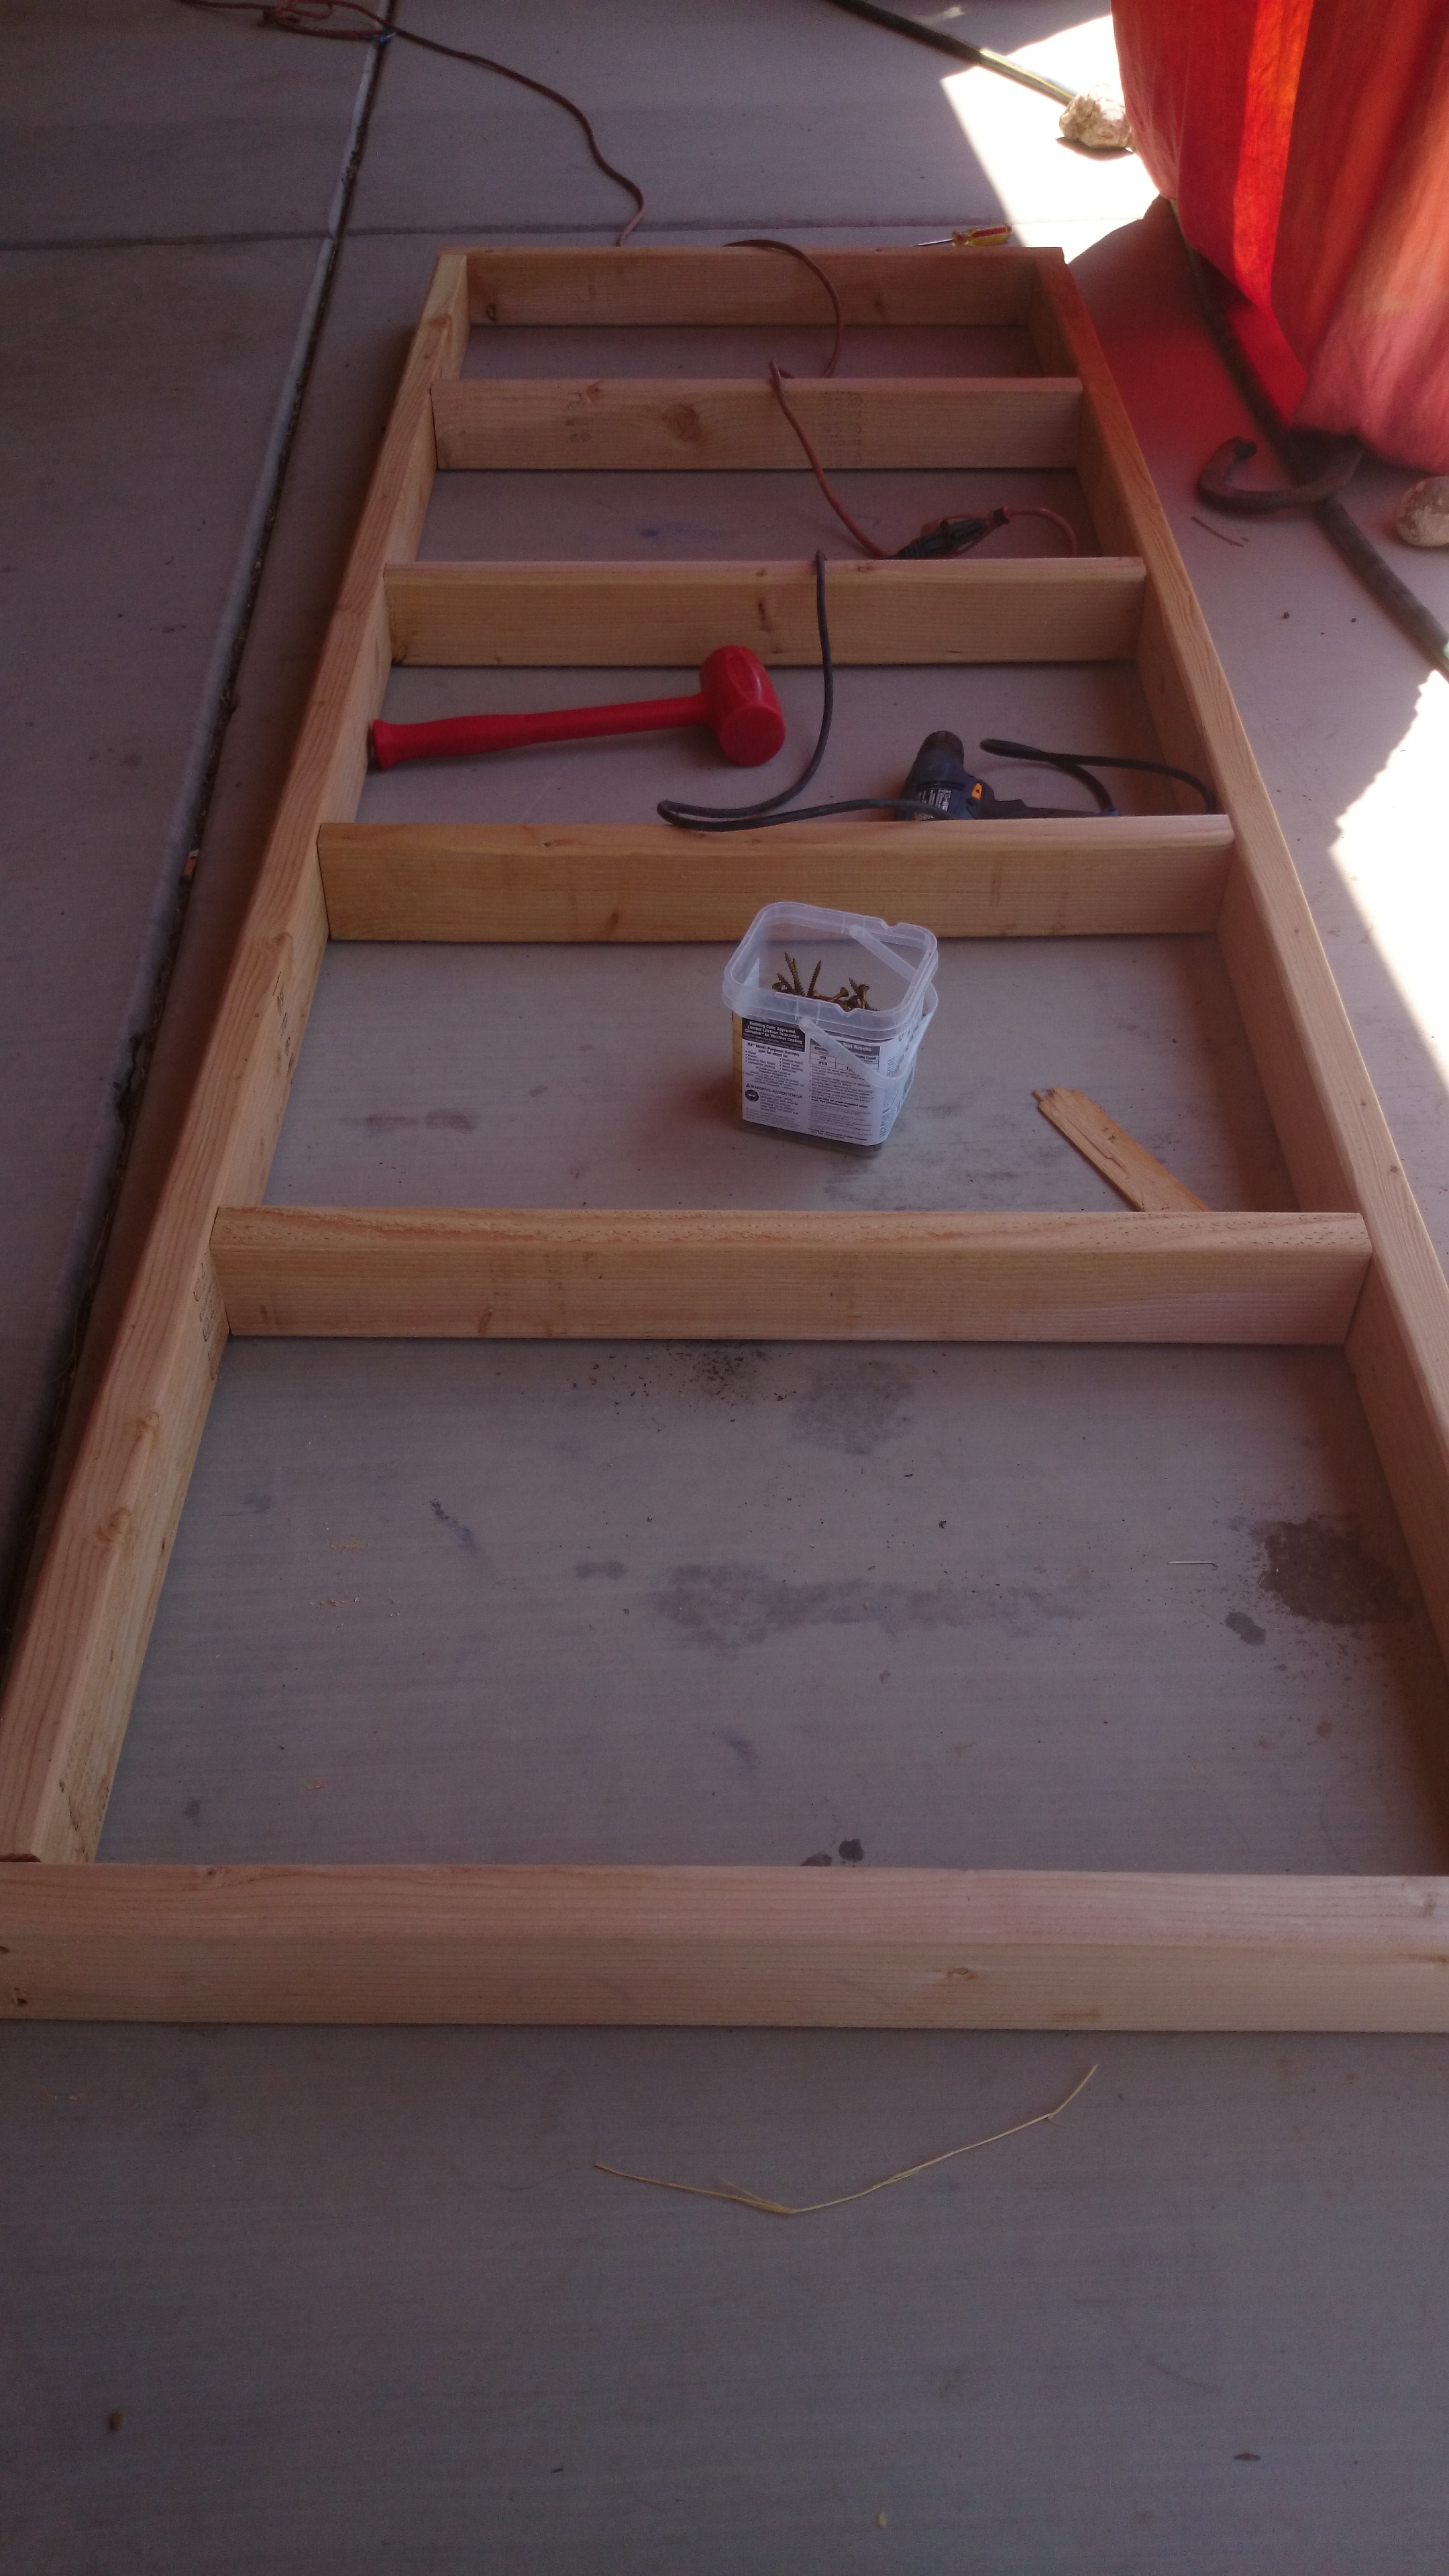
While the dachshunds and I shuffled stuff out of the way and I planned out the length, depth and height of the table, listed the cuts (the doxies are no good with measurements) and the assembly instructions, John was busily taking apart the day bed we’d built. He even managed to salvage all the screws. He was able to start the cuts immediately while I handled the painting.

paintingwallThe dachshunds were positively no help at all with this and landed themselves in jail.

dogjailJohn built the frame for the table using pocket holes. Because we wanted to maximize the storage space of the table top we pretty much knew the table couldn’t be moved in once it was completed. The frame would easily fit but there would be too much overhang on each end. I’m not planning to move this table out. It’s there for the duration of my life. So John added the top boards once the frame was in place in the closet.

buildingtable
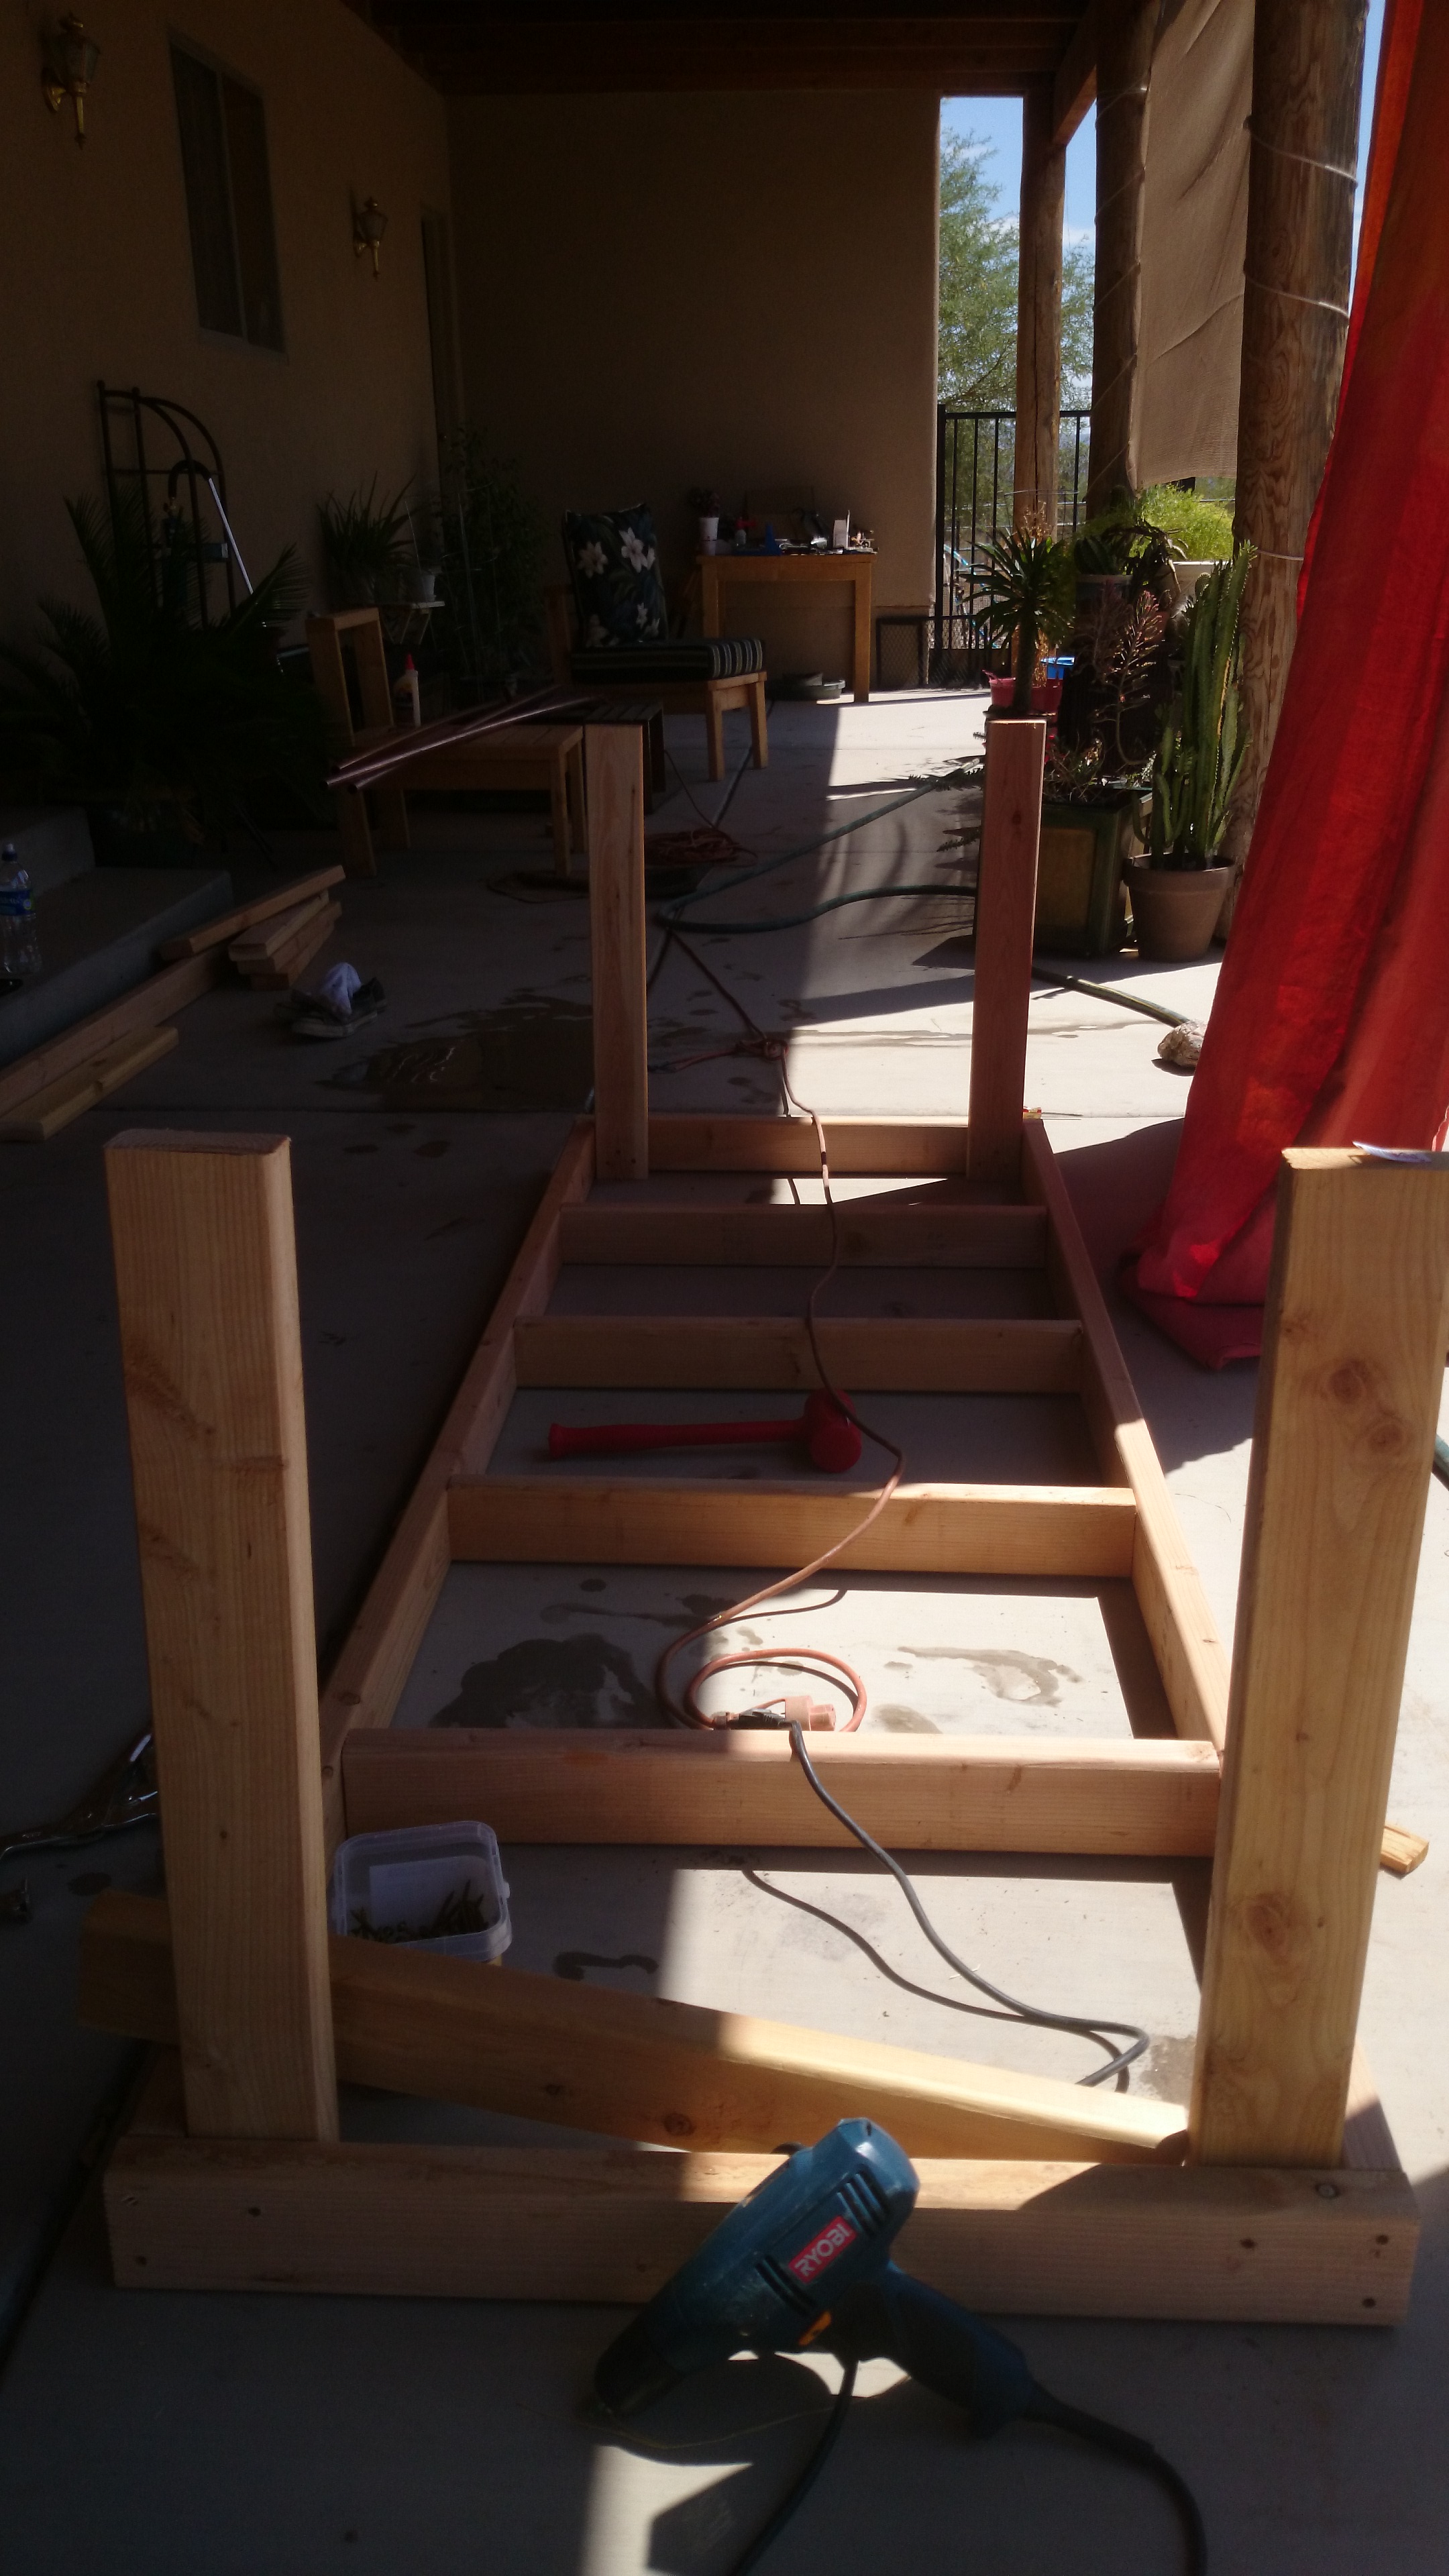
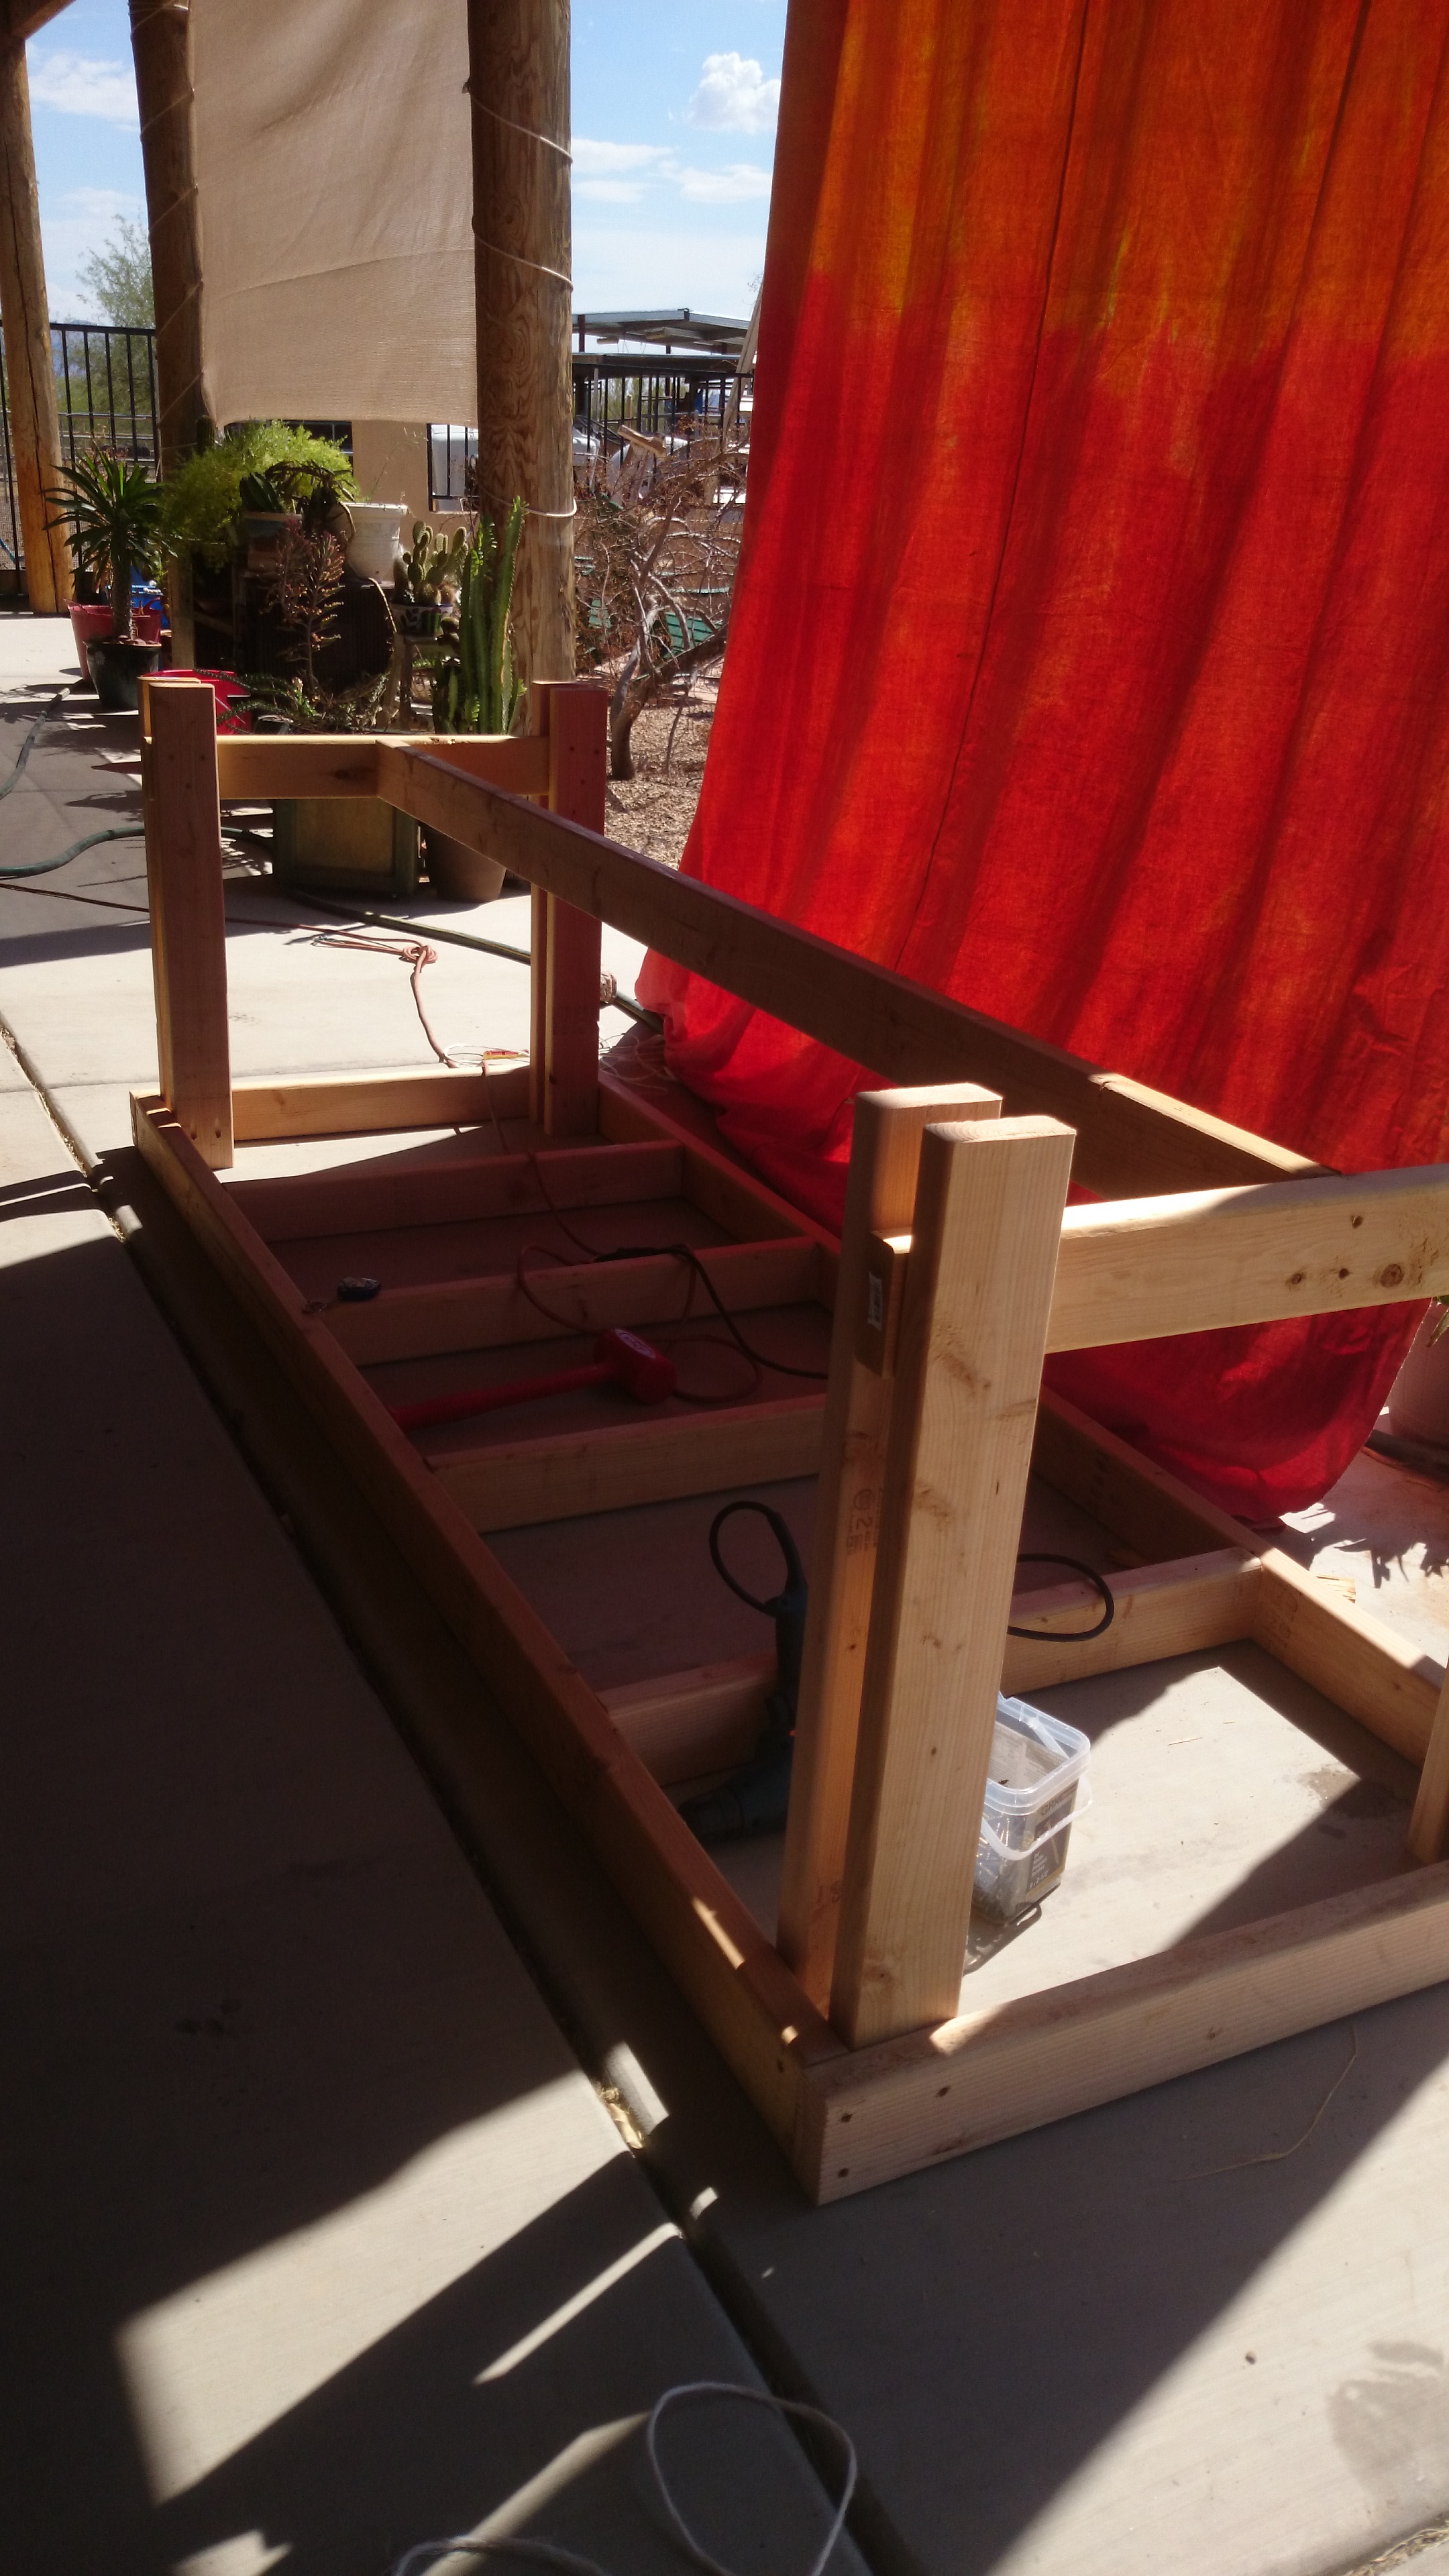
John attaching legs and side supports to front and back supports.

Once the table was built, I painted it and shuffled the stuff back from the kitchen to the closet shelves, with more than one “Oh God don’t let this kill me” as I lugged cases of bottled water.

laundrytableshelves1When I go back in to paint the shelves a nice clean white, I won’t have to lug everything to the kitchen again. I can just set it temporarily on that nice table.

laundrytableunderneath
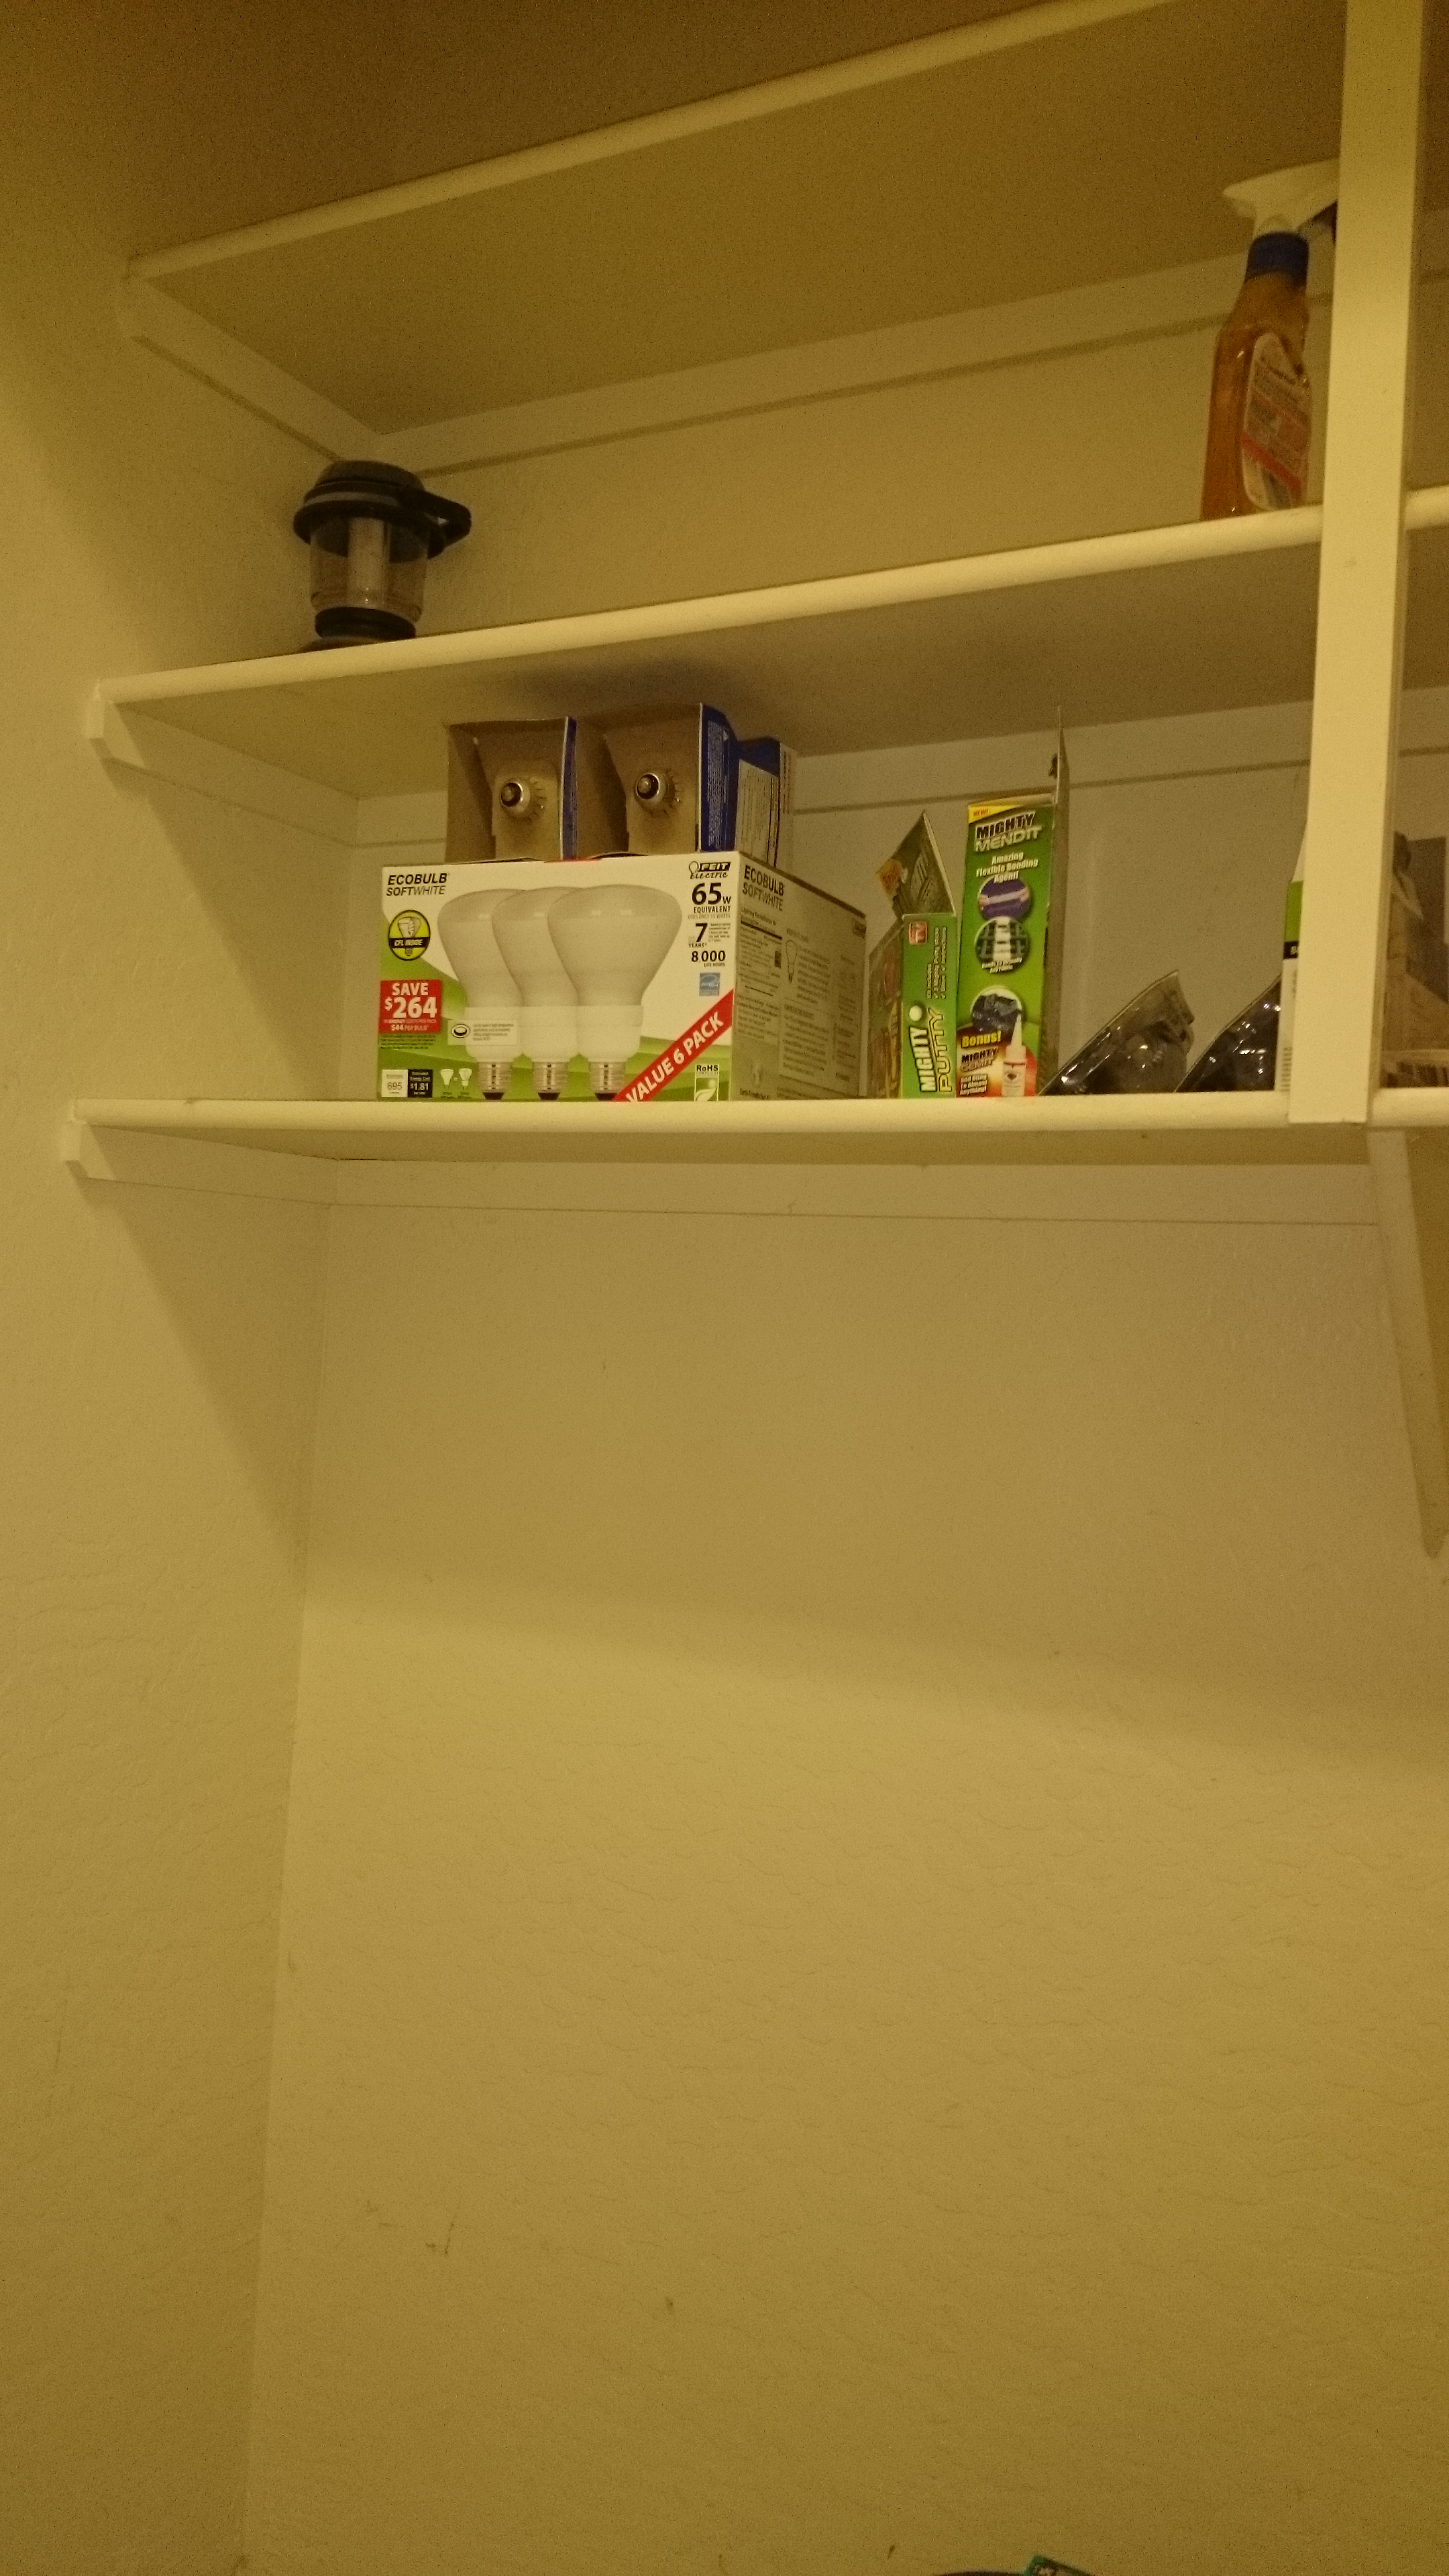
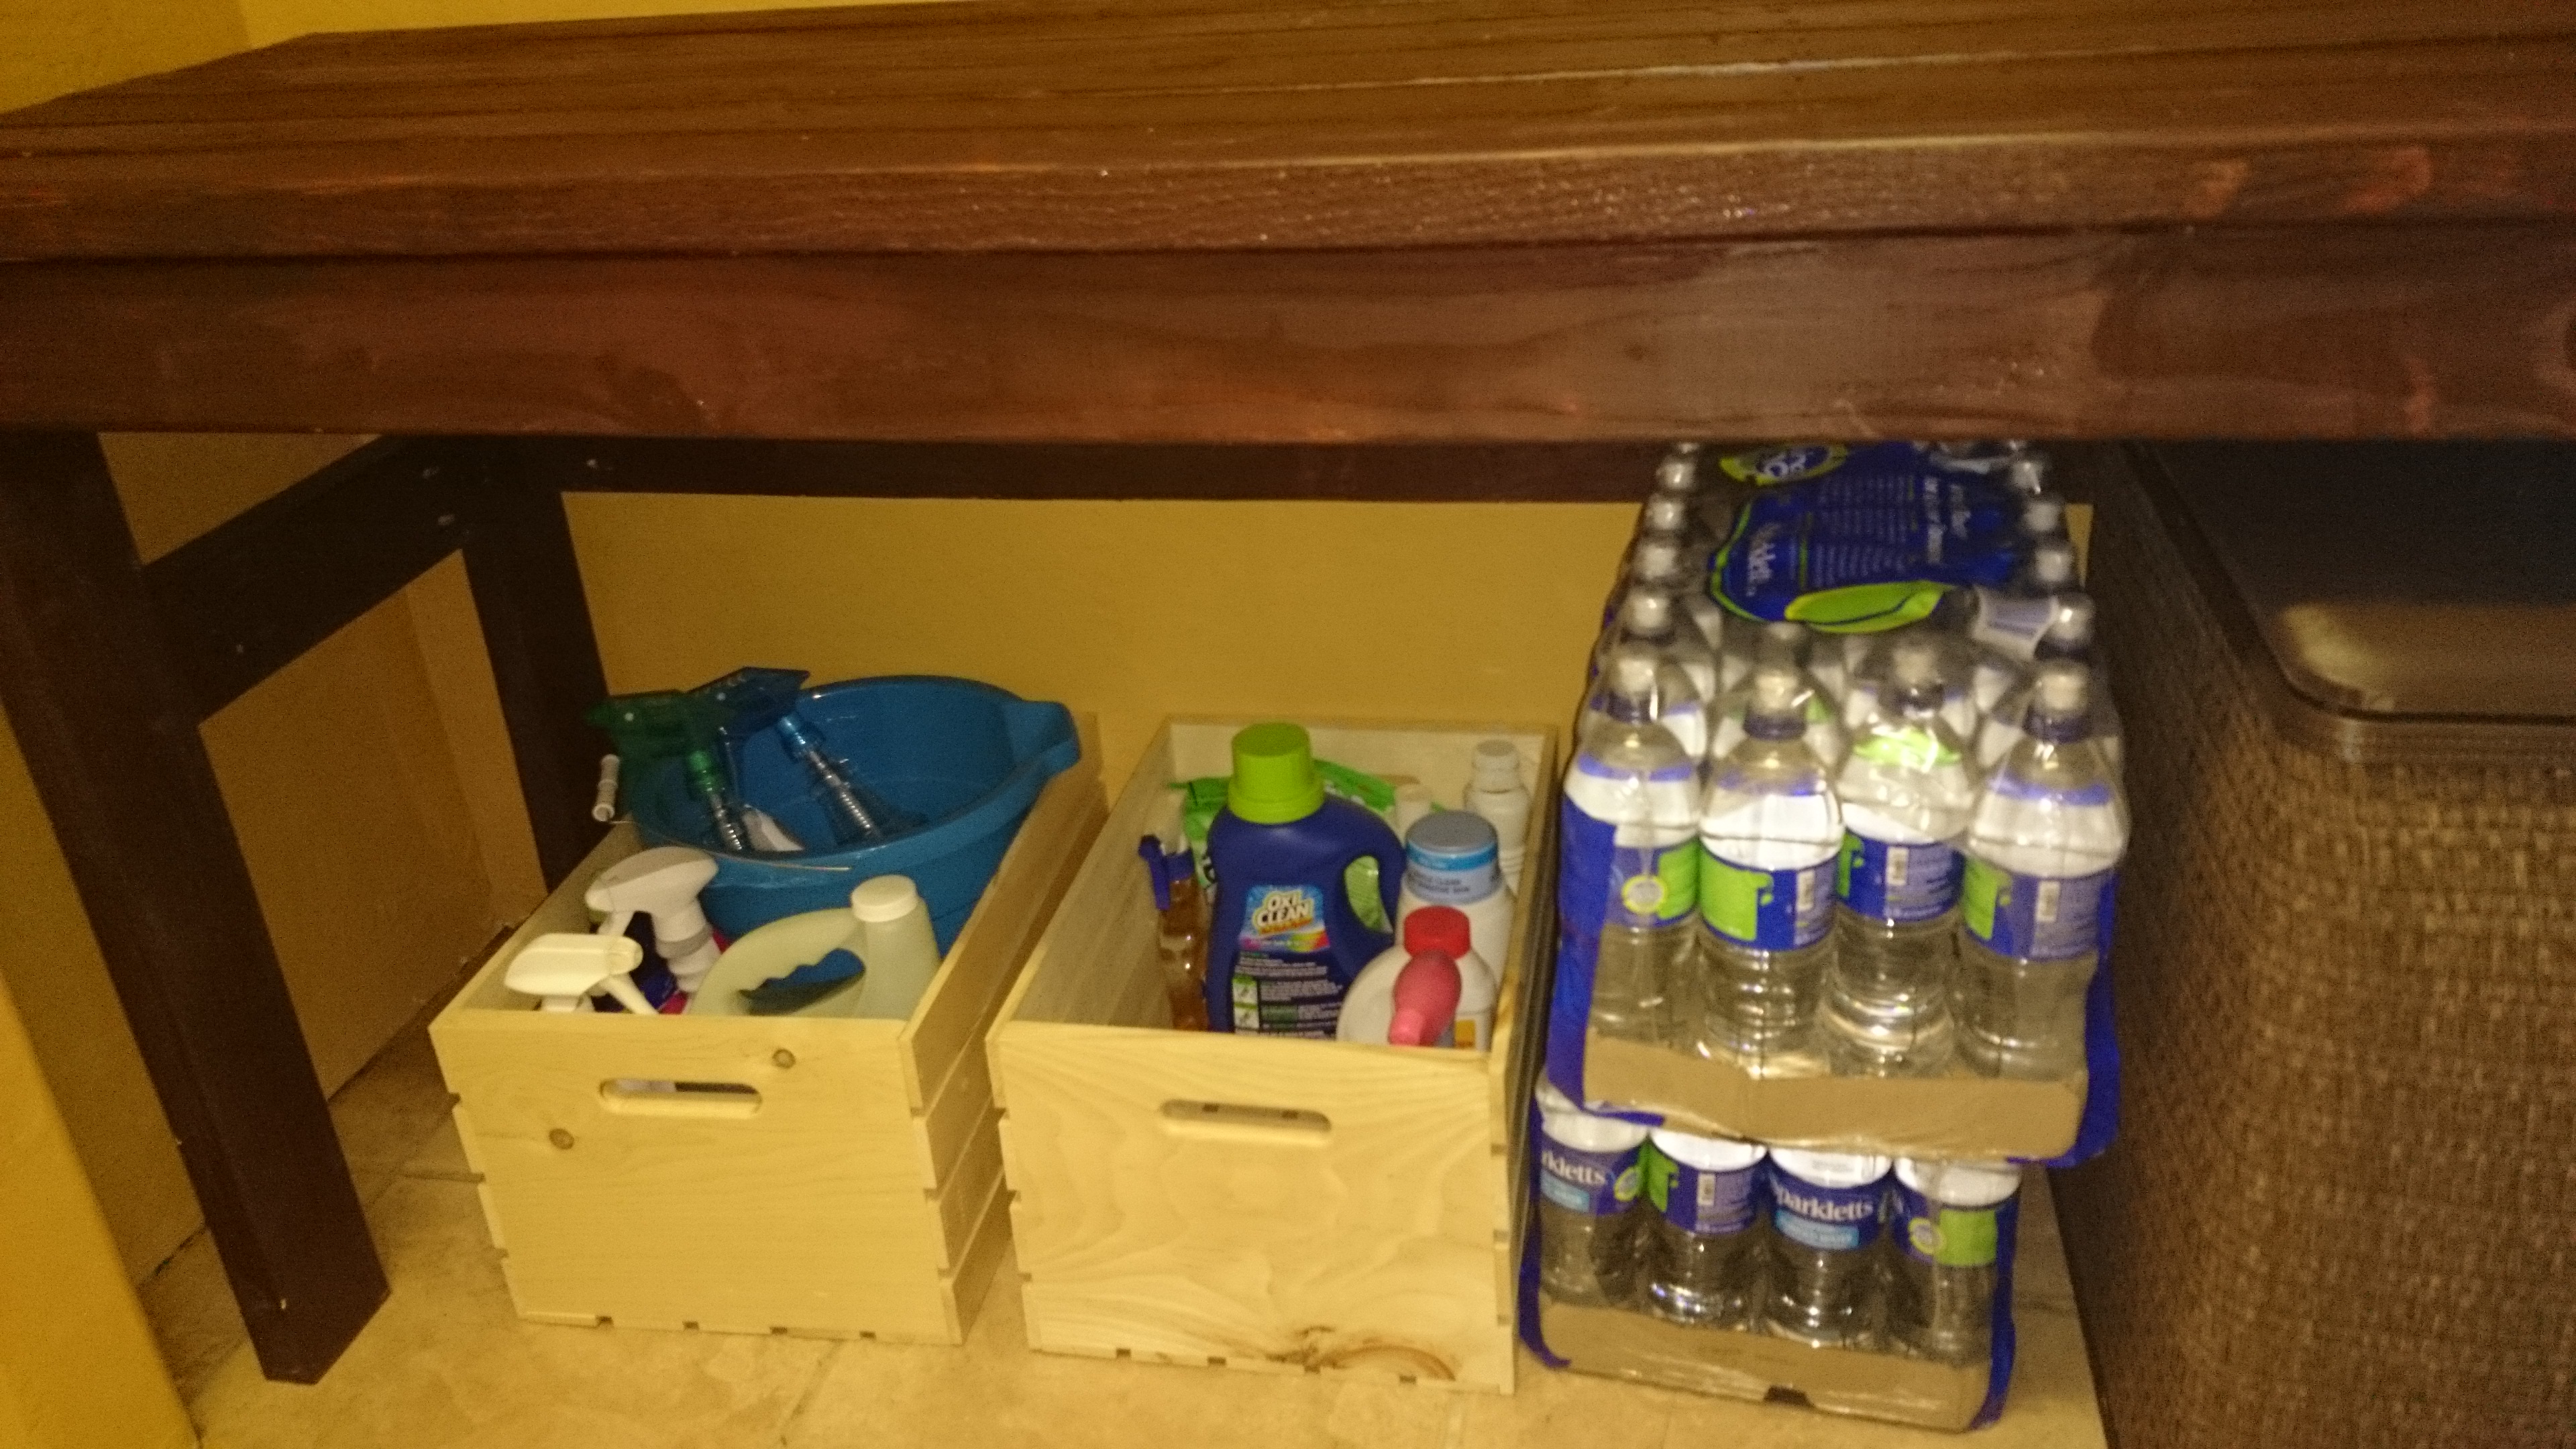
Please notice that the bleach and the crate of floor cleaners has mysteriously vanished. The bleach is in the garage should I ever decide to tie-dye a massive drop cloth again. The floor cleaners are hopefully busy killing some weeds along the horse fence.

The table looks so nice in there I hate to cover it up with my small appliances. Perhaps one day I’ll be able to get them in the pantry and can use the table for something really cool like folding clothes before they leave the laundry room so they don’t end up in a mountain on the foot of my bed.

Now I just need to figure out workable shelves that I can reach over the washer and dryer, paint the rest of the laundry room, repair the scratches in the exterior door from that sliding door incident, and come up with a landing strip of some sort so I can stop losing my keys.

Share this:

  • Click to share on X (Opens in new window) X
  • Click to share on Facebook (Opens in new window) Facebook
Like Loading...

January Cure assignment Work on Project

14 Wednesday Jan 2015

Posted by Jean in Home and other Repairs, Home Decor, January Cure, Wood Crafts

≈ 3 Comments

Tags

DIY, home decor, home furniture, homemade furniture, January Cure, wood craft, wood furniture

laundrypurge2The blank pallet we’ll begin to fill today.

John is off today so we’re going to see just how fast we can get some major building done in the laundry room before he leaves to meet his Juggling Club in the park tonight. There are two big things I’d like to accomplish today.

We’d built a Day Bed early on in our building spree last spring. Actually, it the plan called it a simple modern sofa but it’s so huge it’s actually a Day Bed. I’ve no use for a Day Bed. I also don’t want to waste all that wood. So today will be spent taking apart the Day Bed and turning it into a narrow table that will fit in the laundry closet. My original plan was to turn it into a small table for the front porch, but that will have to wait. A table for the porch is just fun and decorative, while a place to hold small appliances is urgent.

sofafinishedThe Day Bed we will be deconstructing today.

Yesterday I’d picked up a bunch of inexpensive wooden crates to store cleansers that I don’t need on a daily basis, extra sponges, light bulbs and small repair supplies. With the supplies neatly corralled and easily removed, and while John is taking apart that Day Bed, I’ll be painting the laundry closet.

If y’all have kept up with other parts of my blog and have seen the patio furniture and other items we’ve built, you’ll know I love rustic. The all black, white, grey IKEA spartan look is just not me. I’m a Hobbit. So, the narrow table we’ll be building for the laundry closet will be painted to look old, much like we did our patio tables.

patiotriumphThe rustic look patio tables we built will be the look for the laundry table.

While John is deconstructing the Day Bed, I’ll whip up a cut list for the table so that he can go straight from deconstructing to constructing. I don’t have a ready made plan for this, but we built so much furniture last summer to fill the patio and backyard, that I’m confident I can do this.

We have a fairly limited amount of time, less than 8 hours, and two overly helpful dachshunds, so I’d best get out and get the ponies fed so we can get started! Time to crank up the Ride of the Valkyries, yes, to eleven.


Share this:

  • Click to share on X (Opens in new window) X
  • Click to share on Facebook (Opens in new window) Facebook
Like Loading...

Billiam’s Backyard and Patio Reveal!

01 Monday Sep 2014

Posted by Jean in General Farm Stuff, Grief, Home and other Repairs, Rural life, Uncategorized, Wood Crafts

≈ Leave a comment

Tags

DIY, diy chair, do it yourself, garden, garden bed, hanging bed, home decor, home furniture, homemade furniture, how to handle grief, landscaping, outdoor furniture, pallet, patio, patio chair, patio furniture, storage bench, swinging bed, wood chair, wood craft, wood furniture, yard

First of all, I need to thank John. Without his help some of these things could never have been accomplished and the rest would have taken me two years instead of 6 months. Secondly, I want to thank Ana White for the inspiration to Do It Ourselves, and the little family at More Like Home for adjusting some of the plans on Ana’s page so that the projects could be built with 2x4s and for their other 2×4 projects. Thank you to the Apartment Therapy and Houzz sites for their daily decorating inspirations. Thank you to the guys at Articulate Motion for keeping us in pallets, donating a chunk of fabric, and adjusting the metal fire inserts so that they could be used in the dining table. I want to thank the DIYers out there who showed us how to make Beer Bottle Tiki Torches and inspired our hanging bed. Speaking of that hanging bed, I want to thank the wood gurus at Home Depot for putting us on a safe path on that journey. Finally, thanks to all the friends and family who cheered us on and helped us through this traumatic year.

So, here we go! This is what the patio looked like before when we were in the first week of the redo:

patiosouthendbeforepationorthendbeforeBleak wasn’t it?

INSERT FANFARE HERE!

patiotriumphpatioreflectionpatioatnightpatiodiningareapatiogardenconversationareabeerbottletorchespatiobeerbottletorches1patiotablefireinsertshangingbeddressedup

Share this:

  • Click to share on X (Opens in new window) X
  • Click to share on Facebook (Opens in new window) Facebook
Like Loading...

Billiam’s List: Patio Dining Table

16 Saturday Aug 2014

Posted by Jean in Home and other Repairs, Rural life, Uncategorized, Wood Crafts

≈ Leave a comment

Tags

DIY, farm, garden, home decor, home furniture, homemade furniture, landscaping, outdoor furniture, patio furniture, wood craft, wood furniture, yard

Turning back to wood after the tie-dye fiasco we had much better success. My niece will be in town Labor Day weekend and for that special event I decided to unveil the new backyard to the entire family. The only small problem with this is that the patio isn’t finished. I still needed a table and more chairs. This is a bbq event and it’d be nice for the family not to have to sit in the hot gravel. I also had wanted to build a cabinet around an existing old table, and a counter top for meal prep by the grill. If all John and I had to do every day was dink with the patio all these things might get done in spite of the Arizona desert summer. Unfortunately, John doesn’t get enough time off, and it’s way too much for one old woman in this heat. Best we’re going to do is the table and more chairs. The rest will have to wait until the temps dip back down into the low 90s and preferably the 70s.

We decided to tackle the table first. I’ve gotten so good with the chairs that I can whip out two a day by myself, even with frequent breaks to rest my back and hips. The table is too big a project for two hands and we wanted to succeed at something new to get that curtain out of our systems.

2x4s make GREAT, heavy duty, stand up to the test of time, furniture and they’re the cheapest wood buy out there. However, here are a couple of things we’ve learned about them: 1. They’re cheap because they are generally used where no one can see them and it doesn’t matter if they’re warped, twisted or bowed. You have to lay them down flat and be sure they stay flat on on four sides.  You can actually go through a whole stack of 2x4s at Home Depot in order to find twelve straight boards. 2. Once you’ve checked them thoroughly for chewed up spots, warps, twists and bows, you need to use them within a very few days or they will get warped, twisted or bowed even in the dry desert.

The plan for this table is fairly true except that we found the overhang to be less than 2 inches on all sides of the table top. You can find the shopping list, cut list and instructions here: http://www.morelikehome.net/2012/10/day-18-build-homestead-dining-table.html

diningtablecuts

The table looked like a large, fairly complex project, until we saw the cuts laid out on the ground like this. These are the boards, cut and ready for an 8 foot table. Seriously. That’s it. There are ten 8′ boards still in the garage, but if you get 8′ 2x4s you don’t need to cut them.

Because this table will be painted (I’m almost as sick of stain and urethane as I am of dye.), I was not going to waste time with a ton of pocket holes. However, if you prefer staining pocket holes are your best bet so you don’t have to worry about screw heads showing everywhere.

We began with a basic frame to hold the table top. Just a big rectangle with the side boards attached to the ends of the front and back boards.

diningtableouterframe

Into this outer frame, we added 4 support boards.

diningtableframefinishedThe plan for this table calls for two legs at each corner. This adds to the stability when you find a team of percherons to drag this massive table from one place on the patio to another because it’s not about lifting it, and it also adds a bit of architectural interest to a simple design. Because the extra set of legs attach to the table top (this time we did use pocket holes) and to the leg support board, we added them to the frame last.

diningtablelegsOnce we attached the leg support board and the stretcher, we could attach the second set of legs, and all but the table top was done.

diningtablelegsstretcherThis shot of the table top part of the build is interesting in a couple of ways. 1. Like duct tape, baling twine has a billion uses around here. In this instance, it is being used as a simple twist style clamp to hold the boards together at each end so they could easily be screwed into the frame, and also because we waited too long to use these boards and a couple of them became slightly bowed to the side. This straightened them right up and kept them from moving while the boards were attached. 2. That legitimate store bought clamp you see on the left was used to tame the boards that were twisted and warped when we left them in the garage for a couple of weeks after purchase. Because there was little room for the boards to attach at the outer edge of the table top, we did drill pocket holes about every 15 inches so that the boards could be attached not just to the frame, but to the adjacent boards as well.

alwaysneedhaystring

Several views of the finished table. Once the chairs are completed all the wood furniture will be sent to the barn where we will learn how to use the paint sprayer.

patiodiningtablefinishedpatiodiningtablefinished3patiodiningtablefinished4We got a late start on this table which added to the heat exhaustion problems. Because apparently aliens have developed an insatiable taste for 2 1/2″ screws, John had to run to town for a bucket load and we didn’t start cutting until a little past noon. The patio temperature had us both running and dunking in the pool every time our clothes dried out which was about every 20-30 minutes. I personally guzzled 3 liters of water and a gigantic fountain diet coke in 4 hours and still got a heat headache. In spite of plastering spf 80 sunscreen on my skin, I still managed to burn red, or I guess it could have been bake red. But, in spite of the heat we managed to get this table done from cutting to ready to paint in a little less than 5 hours. That’s how simple it was.

Share this:

  • Click to share on X (Opens in new window) X
  • Click to share on Facebook (Opens in new window) Facebook
Like Loading...

DIY Sofa/Daybed

14 Saturday Jun 2014

Posted by Jean in General Farm Stuff, Home and other Repairs, Wood Crafts

≈ Leave a comment

Tags

DIY, do it yourself, home decor, home furniture, homemade furniture, wood craft, wood crafts, wood furniture

Needing a sofa for the den, I’d been looking around for inexpensive ways to build one that would be nice looking, yet be nearly indestructible. You see, again, we’re real people and this house is lived in pretty hard. We also have indoor pets who, despite their small size, can find ways to destroy just about anything. Thankfully, we’ve always had a sense of humor about the chaos, sort of. William used to laugh a lot more than I did when viewing a little dog sitting amidst a pile of chair stuffing, “We can’t have nice things” he’d giggle, while I’d be envisioning doggie handcuffs and mugshots. Bless him, he always was the “better half” of this relationship.

I’d already begun building a patio sectional from plans here: http://www.morelikehome.net/2011/06/our-new-outdoor-sectional.html and had built a very nice patio work table with plans on that same site. Loving the work with inexpensive 2x4s I went back to that site and found plans for a “Simple Modern Sofa” http://www.morelikehome.net/2012/10/day-31-build-simple-modern-sofa-with.html

So, we went to work. First, John started cutting the 2x4s according to the cut list on the plans, and while he was cutting, I drilled the appropriate pocket holes. This way, by the time John was finished cutting the boards, the pocket holes were almost done and within a few minutes we were ready to start putting the frame together. We didn’t speak aloud the niggling feeling that “Wow, this is pretty big”, and trusted the plan, which clearly said “Simple Modern Sofa”.

sofaback2Here you can see John assembling the back of the sofa, drilling into the pocket holes. That blue handled clamp you see is a truly nifty device from Kreg called a right angle clamp. It is built so that one jaw of the clamp is pointed so that it fits down into a pocket hole and holds both boards firmly to prevent movement.

I recently heard that the average height of humans these days is around 5’3″. This would explain not only why I have trouble finding size 12 jeans that don’t hit above my ankle, but also why so many furniture plans seem more suitable to children than to my 5’7″, mostly leg, frame. Having been unhappy at the height of the patio chairs in the sectional plans, we added a few inches to the height of the sofa. We should have added fewer inches, because I didn’t take the depth of the cushion into account.

sofaslatsJohn is adding the seat slats for the sofa here. We had finally begun to mention, in passing, “hmm.. this is pretty big”, and at one point I, half jokingly, said “Well, if it’s too big for the living room you could replace the cheap daybed you’re sleeping on with this.” We weren’t deterred. I needed a sofa darnit, and the plan said, this is a sofa.

sofafinishedBecause I am sick to death of staining, waiting, urethaning, waiting, sanding, waiting, urethaning, waiting, etc. We chose a lovely brown paint, Glidden Stewart House Brown, which looks like devils food cake batter in the can, and goes on the color of Hershey’s Syrup chocolate. The chocolate references are important as well as accurate.

The finished “Simple Modern Sofa” looked great on the enormous patio, as you can see in the photo above. We had to open both sides of the patio door in order to schlep it inside where it magically doubled in size. If anyone would like to buy a gorgeous, sturdy daybed with room for a trundle underneath, just let me know, I happen to have one. I’d be willing to trade this great twin sized bed for a dachshund proof sofa.

In the meantime, I’m going to need a great deal of chocolate in order to live with a bed in my den.


Share this:

  • Click to share on X (Opens in new window) X
  • Click to share on Facebook (Opens in new window) Facebook
Like Loading...
← Older posts
Newer posts →

Posts, stories, woes, vittles, photo and video evidence

Categories

Enter your email address to follow this blog and receive notifications of new posts by email.

Join 45 other subscribers

Current woes, tall tales, and lessons learned

  • Here are the mutts.
  • January Cure 2018- Flowers and Floors and Stuff
  • January Cure 2018 Day 2- Make a list
  • January Cure 2018- Day 1- Clear and Organize a Drawer
  • January Cure 2018: But first a word from our sponsor
  • January Cure Weekend 1- Flowers and Floor
  • Day 3 January Cure 2017- Purge the Pantry vs Cabinet Cleanout
  • Day 2 January Cure 2017- Making a List (humming- checking it twice)
  • January Cure 2017 Day 1
  • Billiam’s List Bedroom Tile: Pat us on the head!

Tags

cabinet cabinet doors chickens cleaning cleaning house cleaning stainless death of spouse desert gardening DIY diy chair do it yourself dreams of dead spouse easy bedspread easy cotton bedspread egg bound farm floors garden garden bed gardening grief hanging bed heirloom squash hens home cleaning home decor home furniture home improvement homemade furniture home organization horse house cleaning how to handle grief how to hide cord clutter how to make serving trays January Cure January Cure 2016 January Cure 2017 January Cure 2018 landscaping mayo arrote miniature horse no sew bedspread off road wheelchair organic gardening organizing ottoman outdoor furniture outoor furniture pallet patio patio chair patio furniture pumpkin serving trays squmpkin storage bench swinging bed TankChair tank chair tech storage tie-dye tie-dye bedspread to-do lists tools tracked wheelchair tree trimming upcyle cabinet door upholstery wood chair wood craft wood crafts wooden chair wood furniture yard

Blog at WordPress.com.

  • Subscribe Subscribed
    • Jean's Blog of Life, Farms and Everything
    • Join 45 other subscribers
    • Already have a WordPress.com account? Log in now.
    • Jean's Blog of Life, Farms and Everything
    • Subscribe Subscribed
    • Sign up
    • Log in
    • Report this content
    • View site in Reader
    • Manage subscriptions
    • Collapse this bar
 

Loading Comments...
 

    %d