Tags
DIY, diy chair, do it yourself, home decor, homemade furniture, outoor furniture, wood craft, wood furniture, wooden chair
I finally got out of the house today. I’ve been trying to get the house fully in order where it can pretty much stay fully in order. This, however, is a long process and is about dull as dishwater. I’ve been itching to get outside and build something, ANYTHING.
A couple of months ago I decided that the front porch needed a table and a couple of chairs. The big back patio faces west and is just too hot to enjoy for about 5 months out of the year. Once the sun moves over the house, the back patio starts heating up and I could bake stuff out there by 3:00pm. Gosh knows John and I have baked ourselves pretty thoroughly out there trying to get projects done last summer. Thus, the front porch will be our go to spot for bbqs and such. I can even clean up the old grill and put it out there. Add a few plants and make it a spot I’ll actually remember to use. I’m pretty sure the front yard landscaping would appreciate it if I remembered it more often.
I had John cut the wood for the chairs back when I thought of this project, but then got side tracked by an intense month of house keeping and organizing. The past two days have been so beautiful that I just could not stand to work in the house again today. I needed sun, blue sky and creativity before I went berserk.
Here are the cut pieces of 2×4 for two chairs. Right where they’ve been sitting for over a month.
 Yup, the cute work table we used all last summer before we finally painted it and made it a part of our patio decor is being pressed into service as a work table again.
I pre-drilled pocket holes in the chair back boards, front apron, side boards and support board. While doing this I had the first inkling of problems caused by not getting around to doing this for over a month. The wood was damp and devilishly difficult to drill because the bit kept getting clogged. I finally got it done though and began putting the chair together.
This is where I noticed problem number 2. I had disregarded my rule of using lumber within a day or two of purchase. No matter how straight a construction grade 2×4 is when you buy it, it can warp, bow and twist while waiting to be used. I had actually thought of this and had John go ahead and cut the pieces the day after we brought them home. Then I put off building the chairs, thinking the cut pieces were too short to bow, warp or twist. Wrong.
The job was more difficult than it had to be, but it’s rustic right? Rustic is a great rationalization.
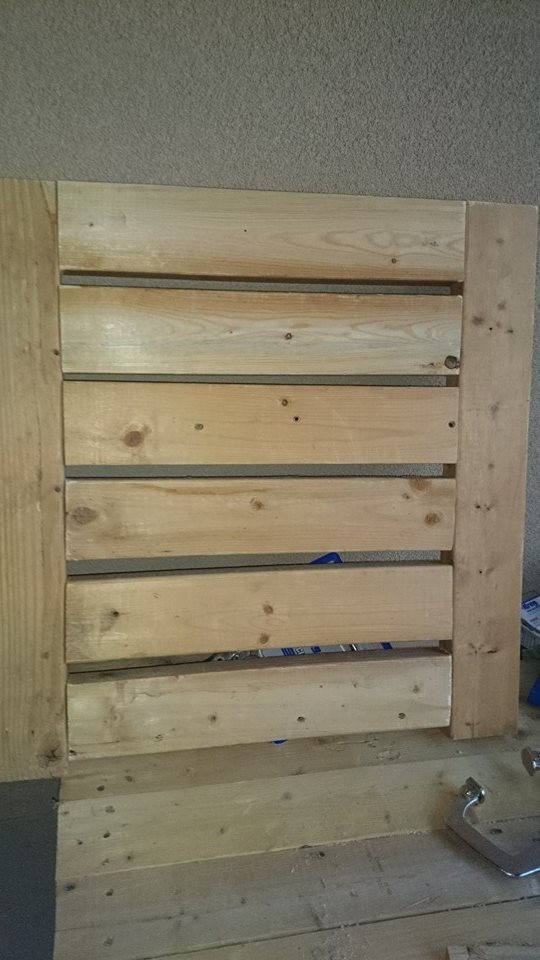
 Clamping the back boards to one back leg, the job was fairly easy until I had to attach the second back leg. That’s when I noticed slight twists in those tiny short 13″ boards. This would mean that I could line them up perfectly with the 2nd back leg but the twist in the short back boards would make the leg slightly crooked. Rustic. That’s the ticket.
 Next on the assembly list is the chair front. The front apron wasn’t too deformed so attaching it to the front legs was ungainly, as usual, but not difficult.
 Once the front of the chair was built and I leaned it up against the back I noticed problem 3. The plans were off by about 1/2 inch. The lowest back board, back apron board, was 1/2 inch higher than the front apron. Not quite enough slant to slide a guest onto the ground, but enough to make them feel like they would. The back apron had to be unscrewed and moved down so that the seat would be level.
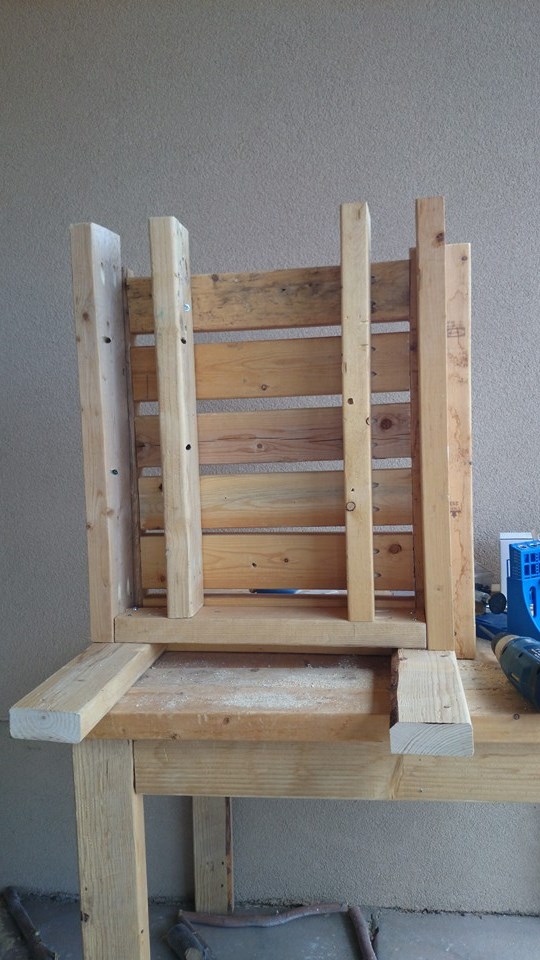
Then it was time to add the side boards. The plans said to attach the side boards 1/2 inch from the outer edge of the legs. I measured and marked the spots. These boards also needed to be attached flush to the top of the front legs and even with the top of the back apron.
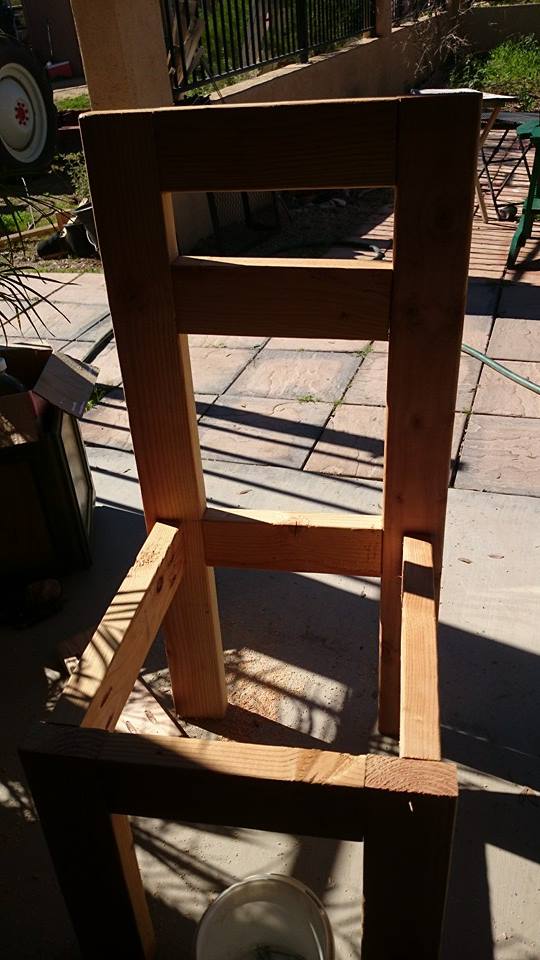 Voila! A chair frame. This was when that slightly crooked back leg began to neener me. Because that one back leg was slightly crooked, the chair wobbles slightly. Rustic. That’s what it is.
Next it was time to screw in the extra seat support board. This board needed to be attached flush against the back apron board, between the two side boards. It didn’t fit. It was, guess what, about 1/2 inch too long. Either the side boards needed to be removed and attached at a little less than 1/2 inch from the edges of the legs or the support board is going to have to be cut again. These are 2x4s. No one is going to fall through them. I’ll recut that support board at some point, but not today dammit.
Next, the three middle seat boards needed to be attached to the front and back aprons. You have NO idea how joyful I was when all three boards fit neatly, and without argument, through the opening in the back. If that measurement had been off I might have just had a bonfire at that point.
Next it was time to add the side seat boards. This is where that slightly crooked leg gave me a full on raspberry. One side seat board was lovely and even with the three middle seat boards. The other, not so much.
 We have a jigsaw. Nuff said.
Once the other chair and the table are built, we’ll sand, putty and paint. For all it’s issues, it’s still a cute chair! You can find the plans for it here: http://www.morelikehome.net/2012/10/day-4-build-simple-chair-with-2x4s.html
If you build this chair, it might be wise to build the front of the chair first. This way you can be sure that the back apron is attached at the same height as the front apron. Also, before attaching the side boards, place the seat support between them and mark where the outer edge of the sides strike the legs.
 The dastardly dachshunds were jailed by the open back door. They just don’t understand why their help is not appreciated.