• As Life Would Have It

Jean's Blog of Life, Farms and Everything

~ Welcome to life on our mini-farm in the AriDzona desert!

Jean's Blog of Life, Farms and Everything

Tag Archives: pallet

January Cure Final Week and Stuff Happens

07 Saturday Feb 2015

Posted by Jean in General Farm Stuff, January Cure

≈ 2 Comments

Tags

DIY, do it yourself, home decor, January Cure, pallet, wood craft

The final week of the Apartment Therapy January Cure and I was IN THE ZONE boy. Over the weeks, I’d organized, polished, cleaned, dumped, and managed to keep the house that way. I was on a rampage. I could see the finish line!

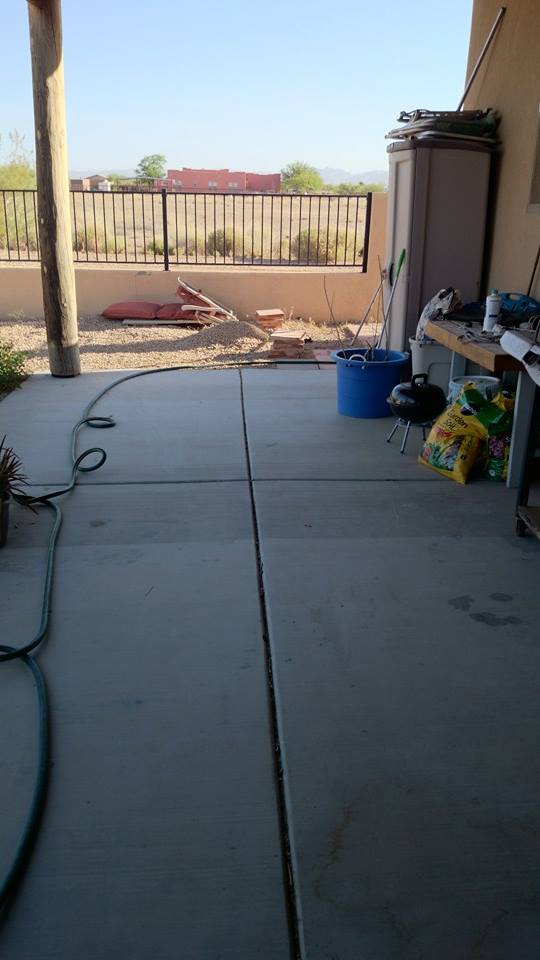
The final big weekend project was the living room. Mine is all part of one big room comprising the kitchen, a dining area and living room. With the kitchen sparkling, my desk organized, and once the dining table was cleared off, there really wasn’t much left for that room. I keep it dusted and picked up because it’s where all visitors land. My long bookshelf/plant stand by the picture window needed attention, but other than that, the room was good to go. I figured 3 hours tops would take care of it. Thus, I commenced with the before pictures.

bookjumblediningroom(That mess was NOT my fault. My son needs to set up a drop zone of his own, in his room instead of using the table as a drop zone. The dastardly rug rumpling dachshund duo need to… well nothing I can do about them except continually straighten rugs.)

livingroom1(No, we’re not protecting the living room from alien brain sucking waves. Aluminum foil works like dastardly dachshund kryptonite to keep them from jumping on and off the furniture. Yes, this is my life.)

So, a couple of hours work should have handled this. I could get more things done than just the living room like continue work on the laundry room and add a single shelf in my bedroom to replace the sad little faux wood bookshelf that is no longer needed. I was confident. Too confident.

Friday, my son and I went to town to pick up a board and a couple of decorative wooden corbels. I had a couple of other errands to run and we stopped in at a Sonic Drive in to grab lunch to take home. That’s where the demise of the weekend began. My son and I have done so much DIY wood working over the past year, that we cannot see a pile of wood without stopping to gawk and dream up ways to use that pile of wood. Well, that very Friday morning that very Sonic drive-in was doing some remodeling and had piled a whole mess of wood in one of the parking slots. We just HAD to ask about it and early Saturday morning we were back with a big trailer.

freewoodThat is a 15 foot trailer. We filled it.

It looked like a lot of wood in the parking slot. It was even more than we thought. It was also heavier than we thought. The winch on the trailer proved to be non-functional so John had to haul these LONG pallets up onto the trailer manually. I can lift, but I can’t carry. All I could do to help was lift and shove from the back, while John dragged from the front. Nothing, at least for us, is as easy as it first appears. Which should have warned me about the rest of the weekend.

I, and this WAS my idea, decided that the easiest and fastest way to unload these mega heavy long pallets was to chain them to the tractor, haul them off the trailer and drag them to a designated “stuffwewillprobablyuse” pile next to one of the corrals. It sounded like a good plan.

My tractor in a memorial to my hubby

tractorandstarsMy tractor is a 1957 Ford 800 series. Thank goodness. I’m not sure if some shiny new green monster would have had a sense of humor about what we did. Because she’s a mature girl (old), she pretty much demands fresh gas if we haven’t cranked her up in a while. We thought we had some. One gas can was empty but the 2nd can was near full (“2nd can” should have been a damned good clue for me, but I wasn’t paying attention and we were rushed for time) and John poured about a gallon into the tank, way more than enough to do this job but I figured I’d drag down some weeds around the property when we were done with the wood.

We tried cranking the tractor, she was reluctant. Very reluctant. Only with a LOT of coughing, sputtering and a cloud of smoke… wait.. I don’t remember her smoking before? But she eventually started. I backed her out into the middle of the backyard, John positioned the truck and got the chain attached to the pallets. I put the tractor in gear to haul the pallets off the trailer and the engine conked out. Starting efforts proved fruitless and drained the battery. This meant we had to move a car around to charge the battery. Starting efforts remained fruitless which meant we had to call a neighbor over for advice. It was while awaiting the arrival of the neighbor that my brain coughed up an old factoid. Wasn’t there a can of old boat gas in the garage? “JOHN? What was in that gas can you put in the tractor? Was that boat gas?” “Dunno.” facepalm. Boat gas, requires added oil. Tractor engines don’t appreciate oil added to their gas. This would explain the smoke. This would also explain the dark blue colored gas my neighbor found in the sediment cup.

The neighbor, kindly, chained the pallets to his truck and we did get them unloaded. He didn’t laugh. Much. The remainder of Saturday (not much left of it by then) and most of my Sunday were spent adding small amounts of good fuel to the tractor, and then draining out the oiled fuel over and over and over because, of course, the tractor had quit on a slight hill and wouldn’t fully drain. The best we could hope for was to weaken the mix enough for the tractor to start. As I said, thank goodness they made tractors the way they did in 1957. I was born the year before this tractor and I’m thinking it’s not a coincidence that they made my tractor well enough to stand up to me. They saw me comin’. The tractor finally cranked up Sunday afternoon, although her gas is still faintly bluish. Bless her.

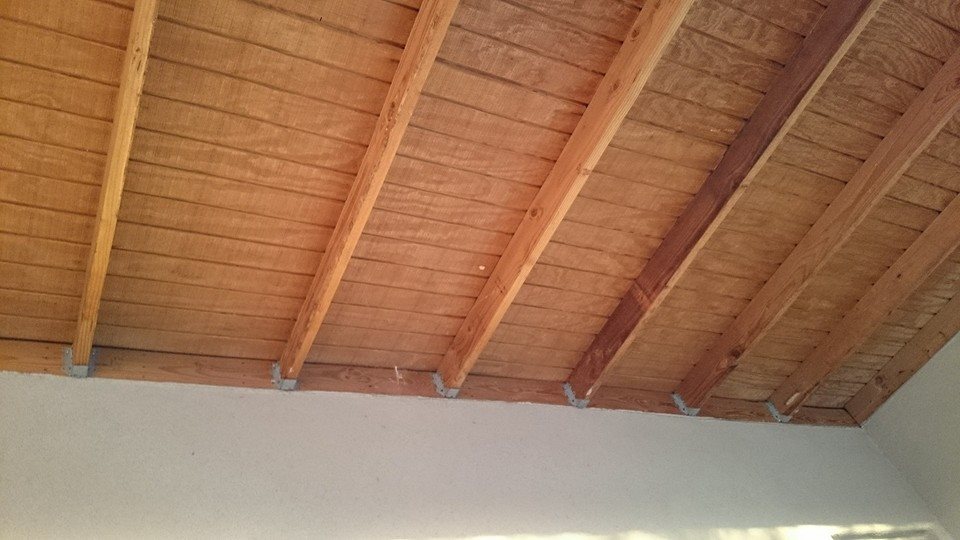
This incident was followed by two days of rain, the discovery of a leak in the ceiling over my kitchen sink, running errands for my heroic, engine expert neighbor’s wife, and then post rain clean up of the barn and corrals (yes, the tractor is still running). My entire final week of the Cure was shot. However, I did manage to clear out and organize the bookshelf, vacuum it thoroughly (including the books) pitch the old non-working stereo and untangle all the plants that had gotten so happy they’d started moving into each others pots. My son also cleared all his dropped items off the dining table which is now, serving as a temporary surface for a craft idea I decided to work on yesterday so it’s still non-functioning as a dining area.

As for my laundry room and that shelf I was going to build in the bedroom, well, to quote Albus Dumbledore after working up the courage to try a Bertie Bott’s Every Flavor Bean, “Alas, earwax”.


Share this:

  • Twitter
  • Facebook

Like this:

Like Loading...

Billiam’s Backyard and Patio Reveal!

01 Monday Sep 2014

Posted by Jean in General Farm Stuff, Grief, Home and other Repairs, Rural life, Uncategorized, Wood Crafts

≈ Leave a comment

Tags

DIY, diy chair, do it yourself, garden, garden bed, hanging bed, home decor, home furniture, homemade furniture, how to handle grief, landscaping, outdoor furniture, pallet, patio, patio chair, patio furniture, storage bench, swinging bed, wood chair, wood craft, wood furniture, yard

First of all, I need to thank John. Without his help some of these things could never have been accomplished and the rest would have taken me two years instead of 6 months. Secondly, I want to thank Ana White for the inspiration to Do It Ourselves, and the little family at More Like Home for adjusting some of the plans on Ana’s page so that the projects could be built with 2x4s and for their other 2×4 projects. Thank you to the Apartment Therapy and Houzz sites for their daily decorating inspirations. Thank you to the guys at Articulate Motion for keeping us in pallets, donating a chunk of fabric, and adjusting the metal fire inserts so that they could be used in the dining table. I want to thank the DIYers out there who showed us how to make Beer Bottle Tiki Torches and inspired our hanging bed. Speaking of that hanging bed, I want to thank the wood gurus at Home Depot for putting us on a safe path on that journey. Finally, thanks to all the friends and family who cheered us on and helped us through this traumatic year.

So, here we go! This is what the patio looked like before when we were in the first week of the redo:

patiosouthendbeforepationorthendbeforeBleak wasn’t it?

INSERT FANFARE HERE!

patiotriumphpatioreflectionpatioatnightpatiodiningareapatiogardenconversationareabeerbottletorchespatiobeerbottletorches1patiotablefireinsertshangingbeddressedup

Share this:

  • Twitter
  • Facebook

Like this:

Like Loading...

Surprise! It’s a Hanging Bed!

08 Thursday May 2014

Posted by Jean in Home and other Repairs, Uncategorized, Wood Crafts

≈ Leave a comment

Tags

DIY, garden, garden bed, hanging bed, pallet, swinging bed, yard

First I’ll show this picture of the bed and then I’ll tell you why this is not the hanging patio bed we originally planned. We will be putting the arms on this week and painting it when the winds die down.

surpriseproject4bedboxWhen we started this project, we had seen several articles about hanging patio beds, how to build them and even people selling them. Looking at the beds themselves, we knew this would be a big project and we’d have to figure out how to do many things, but we really wanted to give it a go. We had all the items we needed to build the bed from the freebie pallets to the Craig’s List wood pile and all we’d need to purchase would be the hardware. We thought. Remember in the blog post “Surprise Project 2: The Surprise is On Us” I mentioned not putting off something you know is going to be a problem later? Yeah, well, here is a picture of the problem we put off until after we put the 150 lb bed together.

surpriseproject4patioproblemoI saw this problem before we began and after seeing all of those handy dandy videos and tutorials, including one from Home Depot, I thought we could figure out a way to deal with it later. The problem is that those are simple 2 x 6s attached to the house with joist hangers. The outer edge of the patio is supported by 4 x 10 beams supported by large log columns. I knew we’d need to figure out a way to bolster the support system of the 2 x 6s but didn’t know how to add support to where the beams join the house. Turns out we couldn’t. After speaking with the very helpful and informative manager of the lumber department at our local Home Depot, we learned that our 6 to 12 pack a day builder had built our patio roof as if it were a simple addition and not the new construction that it was. He told us that most homes under construction have the patio roof firmly attached to the frame of the home and roof. Our guy, slapping up houses cheap and fast during the real estate boom of ’05, did not. Those beams you see up there are attached to nothing more than the fascia. The bed alone might have pulled the fascia down and putting people on the bed would have been calamity.

We considered plan B, which was to hang the bed in a two point system from the large, well supported beam at the outer edge of the patio seen below.  Our patio faces west. This is Arizona. During our 4 month season from hell, the patio can reach 130 degrees by the time the full sun hits it in the afternoons. So right from the get go I didn’t want to hang the bed right where the sun would hit it for 6 to 8 hours. I also didn’t feel the two point system attached to the main beam would allow it to swing in a stable manner. It seemed to me that this would cause a hammock effect and I didn’t want to get dumped onto the patio. Thirdly, our patio has three access points to the pool and back yard. The only way to hang the bed on that one beam would have blocked one of those access points.

surpriseproject4mainpatiobeamThis left us with Plan C., which was to build a very sturdy frame that would stand up to the swinging motion of the bed in four directions as well as 600-700 lbs of weight. Back to Home Depot we went, I’ve been there so many times per week now that even when I don’t need to go my truck has bypassed the grocery that was my intended target and wound up in the Home Depot parking lot. We waited to speak to the chief wood guru who was nice enough to help me decide which wood and size that would handle our load bearing issues. I cannot stress enough that newbies to DIY, like us, take the time to wait and ask the head honchos in each department for their advice. The two top guys in the lumber area at our local Home Depot have been invaluable. You may have to actually corner these guys because they are always busy, and you may have to use a little patience and tact if they hit you with a statement like “Unless I came to your house and looked I can’t tell you what would work…” or something to that effect. Simply ask something like “How can I describe this to help you visualize the problem”, be ready to draw pictures or even better, have photos on your cell phone handy to show, because we all know they are not coming to your house to look at the problem.

For the frame, we chose two 10 ft. 4 x 6 fir beams, one 8 ft. 2 x 6 fir beam, and four 8 ft 4 x 6s for the posts. We used 8 inch carriage bolts to attach the long beams to the posts, and four 3 inch screws to attach the 2 x 6s to the posts on each end of the frame. The 2 x 6s are non-weight bearing and are just there to provide the necessary stability for the back and forth motion of someone on the swing. We used four heavy duty 8″ eye bolts on the long beams and four heavy duty 6″ eye bolts on the bed frame. We set the posts so that there would be about 8 inches of swing room side to side to accomodate random jostling, and about the same back to front to quell the urge for excessive swinging. The bed still swings aplenty back to front, but we didn’t want anyone going crazy with it.

surpriseproject4frame

When setting the posts, we leveled each one every step of the way and leveled each long beam and side support. The 8′ posts are sunk 2 feet into the ground in cement, bringing the height of the frame to six feet tall. As there isn’t enough room to walk under the frame, due to the size of the bed, we felt this was sufficient because anyone taller than six feet would be in the process of sitting, seated, or snoozing and wouldn’t bonk their head. Our excessive leveling process really paid off because the bed swings true. We hung the bed two feet from the ground and used four feet of heavy duty chain on each corner.

We still need to add the arms and back and hope to incorporate some of the natural mesquite branch trimmings. I have a mattress topper on order and will be painting the bed and frame, but it’s already quite a lovely addition to the back yard and it’s been a real temptation to nap already.

Update: Finally got the mattress and linens for the bed. Here’s how it looks all dressed up!

hangingbeddressedupOf course, it’s the end of May and it’s 95 degrees in the shade at 10:00am, but I’ll be able to cozy up and enjoy it this evening, or maybe ’round midnight, for a week or two until it’s 95 degrees at midnight. This fall it will be glorious though!


Share this:

  • Twitter
  • Facebook

Like this:

Like Loading...

Posts, stories, woes, vittles, photo and video evidence

Categories

Enter your email address to follow this blog and receive notifications of new posts by email.

Join 45 other followers

Current woes, tall tales, and lessons learned

  • Here are the mutts.
  • January Cure 2018- Flowers and Floors and Stuff
  • January Cure 2018 Day 2- Make a list
  • January Cure 2018- Day 1- Clear and Organize a Drawer
  • January Cure 2018: But first a word from our sponsor
  • January Cure Weekend 1- Flowers and Floor
  • Day 3 January Cure 2017- Purge the Pantry vs Cabinet Cleanout
  • Day 2 January Cure 2017- Making a List (humming- checking it twice)
  • January Cure 2017 Day 1
  • Billiam’s List Bedroom Tile: Pat us on the head!

Tags

cabinet cabinet doors chickens cleaning cleaning house cleaning stainless death of spouse desert gardening DIY diy chair do it yourself dreams of dead spouse easy bedspread easy cotton bedspread egg bound farm floors garden garden bed gardening grief hanging bed heirloom squash hens home cleaning home decor home furniture home improvement homemade furniture home organization horse house cleaning how to handle grief how to hide cord clutter how to make serving trays January Cure January Cure 2016 January Cure 2017 January Cure 2018 landscaping mayo arrote miniature horse no sew bedspread off road wheelchair organic gardening organizing ottoman outdoor furniture outoor furniture pallet patio patio chair patio furniture pumpkin serving trays squmpkin storage bench swinging bed tank chair TankChair tech storage tie-dye tie-dye bedspread to-do lists tools tracked wheelchair tree trimming upcyle cabinet door upholstery wood chair wood craft wood crafts wooden chair wood furniture yard

Blog at WordPress.com.

  • Follow Following
    • Jean's Blog of Life, Farms and Everything
    • Join 45 other followers
    • Already have a WordPress.com account? Log in now.
    • Jean's Blog of Life, Farms and Everything
    • Customize
    • Follow Following
    • Sign up
    • Log in
    • Report this content
    • View site in Reader
    • Manage subscriptions
    • Collapse this bar
 

Loading Comments...
 

    %d bloggers like this: