• As Life Would Have It

Jean's Blog of Life, Farms and Everything

~ Welcome to life on our mini-farm in the AriDzona desert!

Jean's Blog of Life, Farms and Everything

Tag Archives: homemade furniture

DIY Billiam’s List Patio Chair

25 Sunday May 2014

Posted by Jean in General Farm Stuff, Home and other Repairs, Wood Crafts

≈ 1 Comment

Tags

DIY, diy chair, do it yourself, garden, home decor, home furniture, homemade furniture, outdoor furniture, outoor furniture, patio chair, wood chair, wood craft, wood furniture, wooden chair

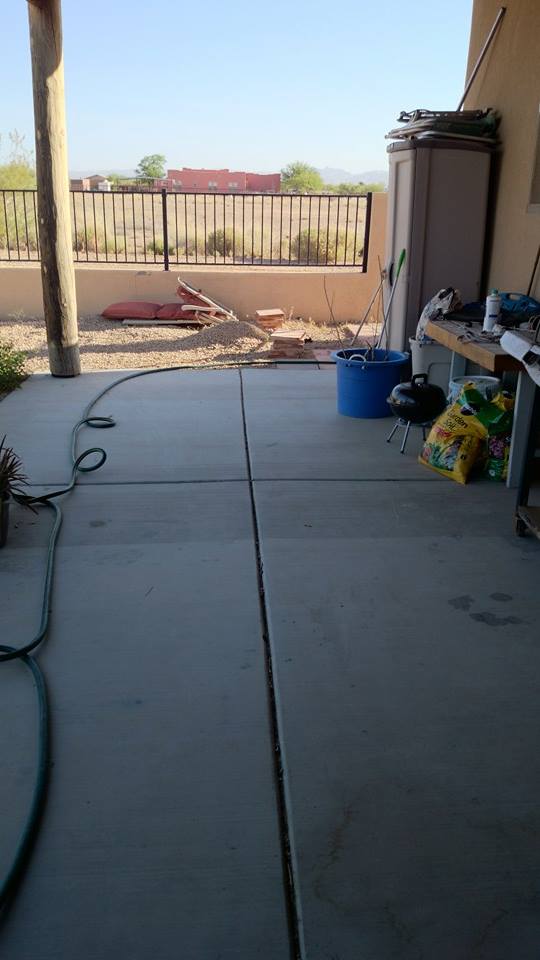
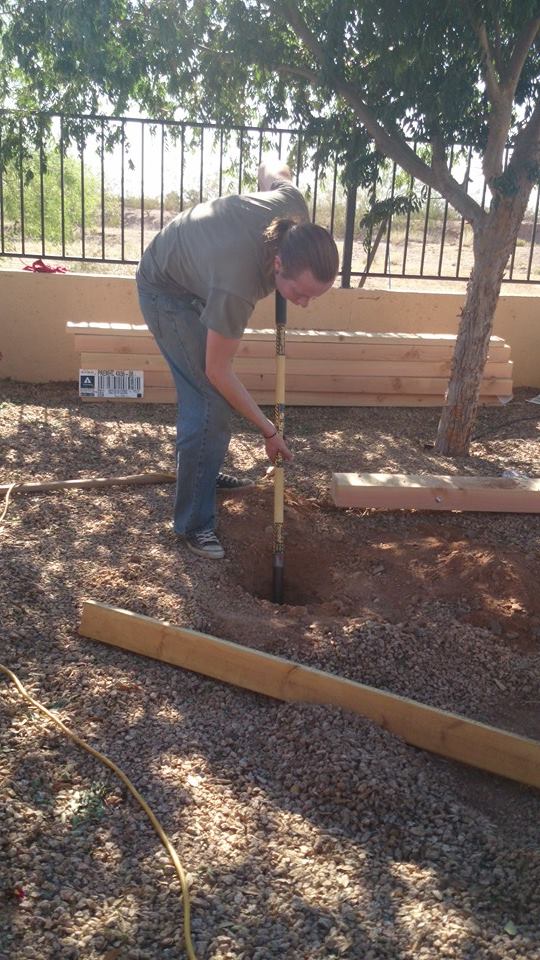
Working strictly with the 2x4s that were included in the Craig’s List haul several months ago, I built a patio chair this weekend. You folks could do this in just a few hours, but I have to take frequent and extended breaks. Even with breaks, I’m a hurting unit right now and will need to take a couple of days off. However, as I recline with my bottle of Tylenol, binge watching Netflix, while my back and hip realign themselves, I will be smiling with pride, because this is the first of our many projects that I built entirely without help.

The original project plans, not using 2x4s, by Ana White, can be found here: http://ana-white.com/2010/05/plans/simple-modern-outdoor-sectional-armless-section

The above plans were modified for using 2x4s which changes the “cut list”. If you plan to make yours out of 2x4s, which to me are sturdier as well as less expensive, use the cut list on this page: http://www.morelikehome.net/2011/06/our-new-outdoor-sectional.html

To the above cut list, you should add another 2×4 cut to 21″. As you will see in my photos, the chair really needs another back board midway between the top of the back and the back of the seat. This board is not added to the 2×4 cut list, yet it is shown in her photos of the finished sectional.  Ana White’s page doesn’t show this board at all in her diagrams and only shows cushions resting against the back, which doesn’t look comfy.

patiochairsectionseatbottom
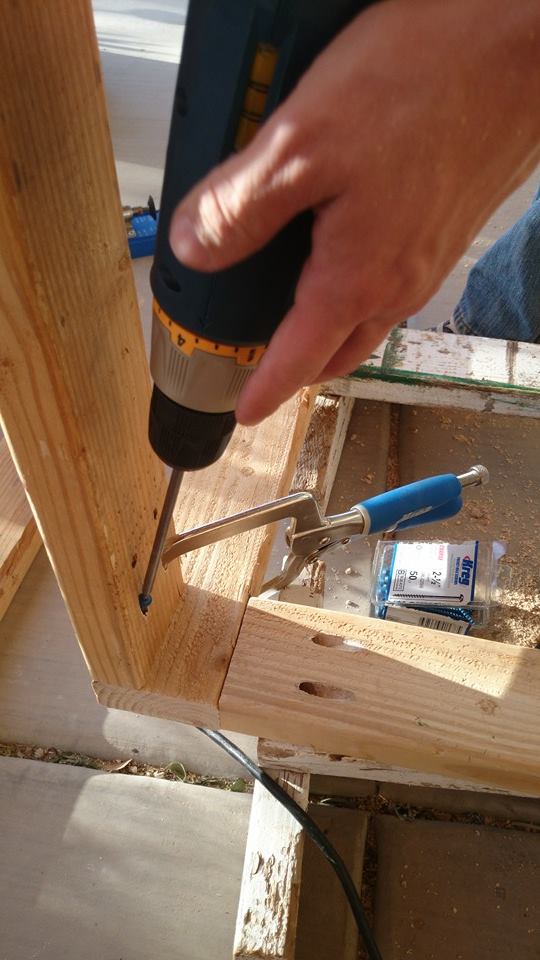
First I put together the seat using the Kreg Pocket hole system. This photo shows the pocket holes at each end of the seat boards. This is the bottom of the chair seat which will be unseen unless someone turns the chair over to check my handiwork and that someone will likely not be invited back anytime soon. Using the pocket holes on the bottom saves you from screwing in from the top to attach everything, leaving visible screws if you care about things like that.

patiochairsectionalseatThis is the top side of the chair seat. See? No screws. It’s magic! This technique also seemed to make the seat very easy to attach to the support frame.

patiochairsectionalsupportAlthough neither of the above sites mentioned it, I used pocket holes in the support frame, not only to attach the frame to the front and back of the chair, but also to the seat boards. I placed three pocket holes along the top edge of each support board as well as the side and front aprons. I laid each piece out on the chair seat and marked where the pocket screws would connect to the seat and then drilled the holes. This took all guess work out of attaching the seat and, again, left no visible screws in the top of the seat.

Ana White’s measurements for the distance between the side apron and the seat support boards is only 3 inches. This is fine until you have to attach those support boards to the back apron. By then, you have all your side aprons and seat support boards firmly attached to the front apron, the seat, and the front legs. I saw this problem coming, so I added another inch and a half between the sides and the supports to allow for the drill. That still was not enough room for my small hands and my Ryobi drill to get between the boards and attach them to the back apron. I would suggest you leave at least 5″ inches of space between these boards.

patiochairsectionalback
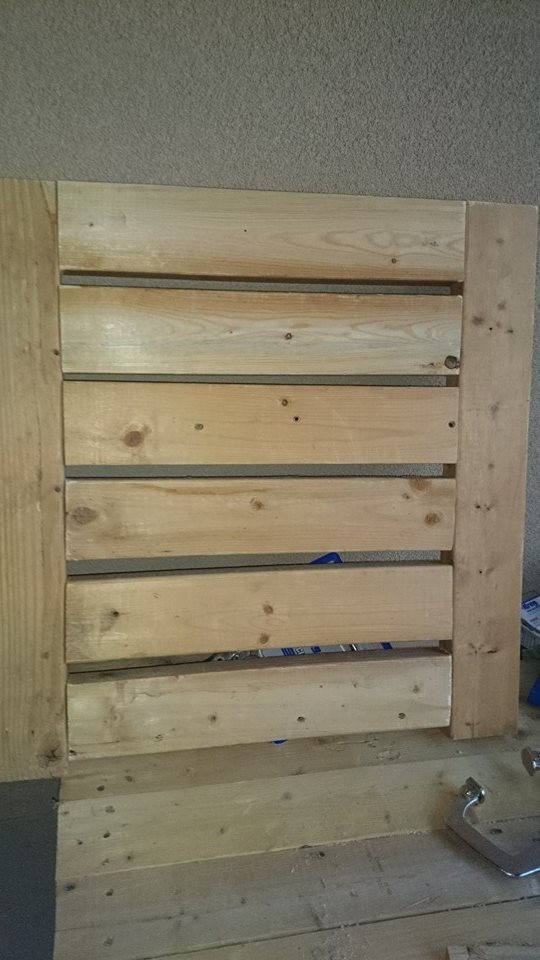
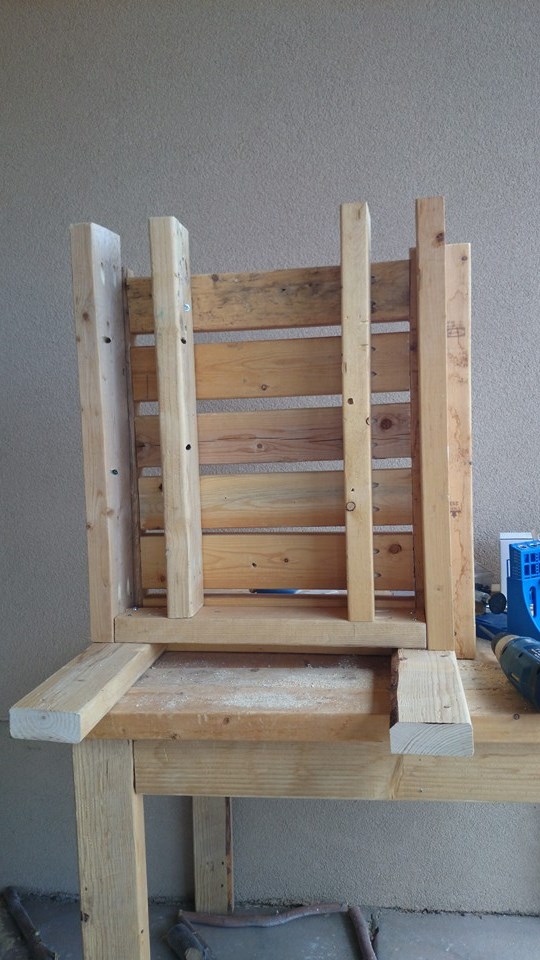
If you are making this chair from the 2x4s, remember that many of the measurements change. Be sure to check the site for the 2×4 built sectional for these changes. For instance, the back seat board for the 2×4 plan needs to be 13 and 1/2 inches from the ground, rather than the 15″ shown on the Ana White plan. One day, I’m going to do the smart thing and print these plans out so that I don’t have to burn wheelchair batteries running back and forth to my computer to double check! I did double check the measurements and instructions each step of the way, and wrote myself about a dozen sticky notes, so I didn’t have any major oopses. Also, you can really see in this picture that another board across the back is needed.

patiochairsectionalfrontHere is the finished patio chair. The plan is for a sectional which I hope to build. Ana White’s page shows how to attach the pieces to each other. To me, that defeats the purpose of having a sectional, so I’m not going to attach each piece. This way, if I need extra chairs by the pool or by the fire pit, I can just swipe a couple from the sectional.

Remember, this is reclaimed wood from Craig’s List. The boards are not perfect and, therefore, neither is the chair they’ve been used to build. If you’re using reclaimed wood, prepare for a few surprises. The board you cut so precisely to fit, may have just enough of a mild twist or bow that it doesn’t fit the way you expected. This is what they make wood clamps, power sanders and cuss words for.


Share this:

  • Click to share on X (Opens in new window) X
  • Click to share on Facebook (Opens in new window) Facebook
Like Loading...

Wood Patio Table/Work Table DIY

20 Tuesday May 2014

Posted by Jean in Home and other Repairs, Uncategorized, Wood Crafts

≈ Leave a comment

Tags

DIY, do it yourself, home decor, home furniture, homemade furniture, outdoor furniture, patio, patio furniture, wood craft, wood furniture

Our back patio is approximately 48 feet long by 12 feet wide. One end is open and the other end adjoins a wall. Having such a large patio is great on one hand because of the outdoor space it provides. On the other hand, however, that’s a long space to fill up! Our back door leads down onto the patio at about the halfway point. Being an entry way to the outdoor room the patio will eventually be, the steps will naturally bisect the space into two halves. Rather than trying to tie the entire long patio together like some sort of banquet hall, it seems natural to me to make two areas.

The grilling  and main dining area will be on the north, open ended side. The sitting, socializing, and sipping tea or cocktails side will be the southern end with the wall. I thought this a natural set up because aftah all, that’s what we do in the south, we sip sweet tea or cocktails and socialize. Actually, my real reason is that the grill should, of course, go on the open ended side of the patio so that the smoke can waft out and away from the patio, and go up the street to make my neighbors drool.

pationorthACK! Don’t look at the mess. This is why people never see pictures of the north end of the patio when I’m out there taking pictures of the pretty plants. This is the end with the big grey plastic monstrosity holding the pool tools and toys, the grill, and a table where we pot plants. Consider this the before picture and try to imagine an outdoor kitchen and dining area here instead of the current clutter.

patiosouthThis is the south side of the patio, with all the pretty plants, and Belle the barn dog who is currently being employed to keep the rabbits and squirrels from devouring the pretty plants. She’s a bit of a micro-manager when it comes to supervising the projects though. This area and the garage are being used as work spaces for our projects. This patio is closed due to construction

The southern end of the patio has that big blank beige wall, and a tiny door to the master bedroom in the corner. I have planned to build a seating area with two storage benches and two chairs, but I hadn’t decided what to do with the big blank wall. Briefly, I considered painting a mural. Then I remembered that I would have to live with whatever I painted. That caused a cringe. As I was surfing through decorating and DIY websites, I came across the use of mirrors outdoors.

Several years ago a friend gave me a large framed mirror that she could no longer use. I knew I could use it, I just didn’t know where to hang it so that it would reflect anything in my house that I wanted to see twice every time I came in the room. When I saw the patio mirrors on the internet, I knew just what to do with the big blank wall. I can’t just have a big mirror on the wall, so we’re building a small table that I can use to work on the patio projects. Once the patio projects are finished, I will paint the table and place it under the big mirror, and fill it with plants, candles, and whatever pretty stuff I think might be safe there.

patiotablejoiningWe decided on this simple project not only because it is functional and I needed a table, but also because we wanted to practice our pocket hole joinery technique before moving on to more complicated projects. We first pre-drilled all of the necessary pocket holes for the frame boards. After that, joining the pieces went faster than assembling any furniture I’ve ever bought in a box.

patiotableframeThe completed table frame is also much sturdier with our pocket holes than anything I’ve ever put together out of a box. The screws hold fast without using glue!

patiotableWe were going to use pocket holes to attach the table top and the only thing that stopped us, as usual, was that we didn’t have enough screws. Instead, we drilled in from the top to attach the boards. If this had been a project I planned to stain, I’d have probably waited and bought more screws, but because we’re leaving it unfinished to use as a work table and, in the end, will be painted, I’ll just fill the shallow holes around the screws before I sand and paint.

You can find the plans for this project, along with 30 more things to do with 2x4s here: http://www.morelikehome.net/2012/10/day-30-build-2×4-craft-table.html


Share this:

  • Click to share on X (Opens in new window) X
  • Click to share on Facebook (Opens in new window) Facebook
Like Loading...

Surprise DIY project 3

04 Sunday May 2014

Posted by Jean in Home and other Repairs, Uncategorized, Wood Crafts

≈ Leave a comment

Tags

DIY, do it yourself, homemade furniture, patio, wood craft

I suppose the suspense of waiting to find out more about this project does require a few posts just to keep it going. Unfortunately, when there’s been nothing to report, I can report nothing. It’s “spring” in the desert and I don’t have an enclosed work space for the wood projects. The wind has ground most projects to a complete halt.

Since our work is done in the garage or on the patio, anything requiring paint, stain or urethane is stacked up waiting for the wind to stop blowing half a ton of desert dirt and debris over everything. I have spent most days looking like one of the sand people from Star Wars, with my face mask, safety goggles, protective clothing and my iPod plugged into my ears and that’s just to feed hay to the ponies. The incessant roaring and buffeting of the wind blocked my ability to think of anything except the incessant roaring and buffeting of the wind, and made it impossible for us to do the thinking required to solve the problems we’ve faced on this project.

The wind has calmed, temporarily, for the past two days. Just long enough for me to figure out what we need to do to move ahead on the project again, get the materials, and get to work on Plan C.  Plan A had to be scrapped thanks to some less than professional work by the 12 pack a day builder. Plan B was scrapped because I couldn’t have lived with that alternative. Plan C., however, will not only solve the problems faced with the previous plans, but it has the added bonus of checking off another of the things on Billiam’s To-Do List.

Plan C. required digging through the hard packed, dry, rock filled desert dirt. Yesterday was our first 100 degree day of the year. We’re also pretty busy trying to get the house and property spruced up for an upcoming interview regarding my TankChair, Sherman. John was at work on the project while I ran around picking up everything blown about by the winds last week, pulled more weeds, and cleaned the swimming pool (in time for more winds to arrive this afternoon). We couldn’t use a post hole digger or even the pick axe to dig these holes because this area is home to the pipes for the leach field of the septic system.

johndiggingsurpriseprojectWe’d hoped to get an early start on the project yesterday morning. We were at Home Depot at 9:00am and thought we’d be home and working by 10.  Everything that could impede progress at the store, impeded our progress. A new pallet of the wood we needed had to be retrieved from the uppermost shelves, the fork lift ran out of gas before the driver was able to finish loading the wood stack onto the empty shelves and the tanks had to be switched out, a manager from another department came past, noticed the fork lift loaded with wood sitting there and felt compelled to harrass the fork lift driver for something clearly beyond his control (before I lost my cool and asked her to please get out of his butt long enough for me to get my wood and go home because I’d been waiting almost an hour already), and a line 6 customers deep in the lumber section that stayed 6 customers deep for 10 minutes before another line was opened. Our “quick trip” to Home Depot that should have taken 30 minutes, took three times that. I really must rant in another section about being in a manual wheelchair at Home Depot, or any crowded business, on a Saturday in another section, but suffice to say, those issues contributed to some pretty severe frustration by the time we were finally on our way to load the pickup, and were partly to blame for me losing my cool in the above mentioned event.

Here are the materials we will be using to execute Plan C.

plancmaterialssurpriseproject

I will be doing more house and yard chores in preparation for the TankChair interview, but hopefully we’ll get a little more done this evening and tomorrow to show. Once the interview has passed, and the next bout of winds have abated we’ll be able to pick up the pace again and get this thing completed!


Share this:

  • Click to share on X (Opens in new window) X
  • Click to share on Facebook (Opens in new window) Facebook
Like Loading...
Newer posts →

Posts, stories, woes, vittles, photo and video evidence

Categories

Enter your email address to follow this blog and receive notifications of new posts by email.

Join 45 other subscribers

Current woes, tall tales, and lessons learned

  • Here are the mutts.
  • January Cure 2018- Flowers and Floors and Stuff
  • January Cure 2018 Day 2- Make a list
  • January Cure 2018- Day 1- Clear and Organize a Drawer
  • January Cure 2018: But first a word from our sponsor
  • January Cure Weekend 1- Flowers and Floor
  • Day 3 January Cure 2017- Purge the Pantry vs Cabinet Cleanout
  • Day 2 January Cure 2017- Making a List (humming- checking it twice)
  • January Cure 2017 Day 1
  • Billiam’s List Bedroom Tile: Pat us on the head!

Tags

cabinet cabinet doors chickens cleaning cleaning house cleaning stainless death of spouse desert gardening DIY diy chair do it yourself dreams of dead spouse easy bedspread easy cotton bedspread egg bound farm floors garden garden bed gardening grief hanging bed heirloom squash hens home cleaning home decor home furniture home improvement homemade furniture home organization horse house cleaning how to handle grief how to hide cord clutter how to make serving trays January Cure January Cure 2016 January Cure 2017 January Cure 2018 landscaping mayo arrote miniature horse no sew bedspread off road wheelchair organic gardening organizing ottoman outdoor furniture outoor furniture pallet patio patio chair patio furniture pumpkin serving trays squmpkin storage bench swinging bed TankChair tank chair tech storage tie-dye tie-dye bedspread to-do lists tools tracked wheelchair tree trimming upcyle cabinet door upholstery wood chair wood craft wood crafts wooden chair wood furniture yard

Blog at WordPress.com.

  • Subscribe Subscribed
    • Jean's Blog of Life, Farms and Everything
    • Join 45 other subscribers
    • Already have a WordPress.com account? Log in now.
    • Jean's Blog of Life, Farms and Everything
    • Subscribe Subscribed
    • Sign up
    • Log in
    • Report this content
    • View site in Reader
    • Manage subscriptions
    • Collapse this bar
 

Loading Comments...
 

    %d